Dinner · Part 2 of 3: Instructions
Butter Cream Apple Cider Ribeye Pork Chops: Slow-Cooker Dinner Step-by-step instructions
- Prep
- Cook
- Total
- Serves
- 4
Before you start
Before starting, pat the pork chops dry and trim any excess fat if desired. Slice the apples into 1/4-inch thick wedges, leaving the skin on for texture and color. Measure out the brown sugar, apple cider, butter, and cream so they are ready to add.
No need to brown the pork chops or sauté anything; this recipe is truly dump-and-go. Make sure the slow cooker is clean and dry, and have a serving spoon ready. If you plan to serve with mashed potatoes, prepare them just before serving or keep them warm in a covered dish.
Ingredients at a glance (6)
- 4 bone-in ribeye pork chops (about 1 inch thick)
- 2 Honeycrisp apples, sliced
- 1/4 cup dark brown sugar, packed
- 1/2 cup unfiltered apple cider
- 4 tbsp salted butter, cut into pats
- 1/2 cup heavy whipping cream
Instructions
Layer and Season
- Layer the Pork ChopsPlace the bone-in ribeye pork chops in the bottom of a 6-quart slow cooker in a single layer, overlapping slightly if needed.Look for The chops should fit comfortably in the bottom of the slow cooker.Tip For even cooking, choose chops of similar thickness.
- Add Apples and SugarScatter the sliced Honeycrisp apples over the pork chops, then sprinkle with the packed dark brown sugar.Look for The apples and sugar should cover the chops evenly.Tip Toss the apples with the sugar to help them release their juices.
- Pour in CiderPour the unfiltered apple cider over the apples and pork chops, making sure some liquid is in the bottom of the slow cooker.Look for The liquid should come about halfway up the sides of the chops.Tip If the chops are not partially submerged, add a little more cider or water.
At the end of this phase, the slow cooker contains a neat layer of pork chops topped with apple slices, brown sugar, and a pour of apple cider. The sugar will begin to dissolve, and the juices from the apples will start to release. The ingredients should look fresh and colorful, with the brown sugar visibly sprinkled over the apples. There is no need to stir; just make sure the liquid is enough to partially cover the chops.
Slow Cook
- Top with Butter and CreamPlace the pats of salted butter on top of the pork chops and apples, then pour the heavy whipping cream over everything.Look for The butter and cream will create a rich sauce as they melt.Tip Do not stir; the layers will meld during cooking.
- Slow Cook on LowCover the slow cooker and cook on low for 6 to 7 hours, until the pork chops are fork-tender and cooked through. Let it rest for 3 minutes before slicing.Look for The meat should be tender and easily pull apart with a fork.Safe temperature 145°F (63°C) internal temperature (steaks, chops and roasts)Tip Cooking on low keeps the pork chops moist; avoid high heat to prevent toughness.
After 6 to 7 hours on low, the kitchen fills with a sweet, savory aroma. The pork chops are tender and easily pierced with a fork, and the apples have softened and taken on a golden hue.
The sauce has turned a light caramel color, and pools of butter and cream are visible around the edges. The meat should be cooked through, reaching at least 145°F (63°C) in the center. The sauce may look slightly separated but will emulsify when stirred gently.
Rest and Serve
- Rest the Pork ChopsTurn off the slow cooker and let the pork chops rest in the sauce for at least 3 minutes before serving.Look for The meat will reabsorb juices and become even more tender.Tip Resting is essential for juicy pork; the internal temperature will rise slightly.
- Serve with SauceUsing a serving spoon, lift the pork chops and apples onto plates and spoon the creamy sauce over the top.Look for The sauce should be thick and velvety, coating the spoon.Tip Serve over mashed potatoes or with crusty bread to soak up the sauce.
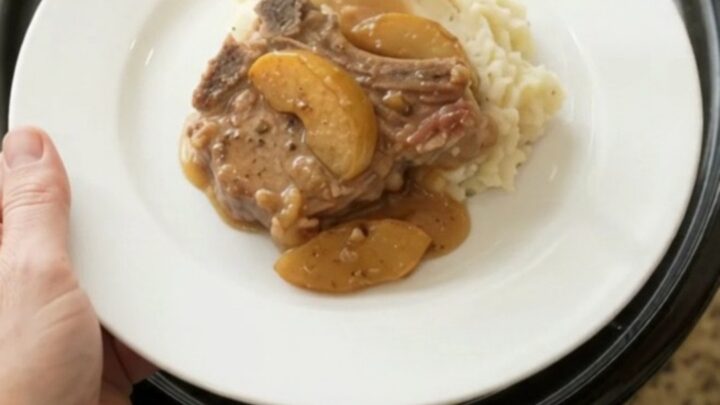
After resting, the pork chops are moist and the sauce has thickened slightly. The apples are soft but still hold their shape, and the sauce is creamy and glossy. When lifted with a spoon, the pork chops are glistening with sauce and the apples are caramelized. The dish looks hearty and inviting, with a rich, velvety sauce that coats the back of a spoon. Serve immediately, spooning extra sauce over each portion.
Common mistakes
Avoid cooking on high heat, as this can make the pork chops tough and dry. Also, resist the urge to stir the ingredients after adding the cream; stirring can break up the apples and make the sauce cloudy.
Be careful not to overcook the pork chops, as they can become mushy if left for too long. If the sauce seems too thin at the end, remove the chops and apples and simmer the sauce on the stovetop to reduce it. Always check the internal temperature to ensure food safety.
How to tell it’s done
The pork chops are done when they are fork-tender and have reached an internal temperature of at least 145°F (63°C) in the thickest part, measured with an instant-read thermometer. Because they are cooked on low for a long time, they may be even more tender; the meat should easily pull apart with a fork.
The apples should be soft but not disintegrated, and the sauce should be slightly thickened and creamy. Let the chops rest for at least 3 minutes before serving to allow the juices to redistribute.
- Steaks, chops and roasts: 145°F (63°C) in the thickest part, then a 3-minute rest
Up next · Part 3 of 3
4 variations · storage & make-ahead · 5 answers · printable card
Tips, FAQ & printable recipe (Part 3)← Back to the ingredients (Part 1)