Desserts · Part 2 of 3: Instructions
Brown Sugar Pear Biscuit Cobbler for a Cozy Dessert Step-by-step instructions
- Prep
- Cook
- Total
- Serves
- 8
Before you start
Before beginning, ensure all ingredients are at room temperature to help the baking process. Peel and slice your pears carefully, aiming for consistent thickness to ensure they finish cooking at the same time.
Have your baking dish ready and clear a workspace to assemble the components without rushing. Ensure your oven is preheated to the correct temperature, as this is vital for the biscuits to rise properly and achieve a golden crust.
Ingredients at a glance (5)
- 6 large pears, peeled, cored, and thinly sliced
- 1/2 cup unsalted butter, melted
- 1 cup brown sugar, packed
- 1 tsp ground cinnamon
- 1 can (16 oz) refrigerated biscuit dough
Instructions
Pear Preparation
- Prepare the PearsPreheat the oven to 375°F (190°C). Peel, core, and slice the pears into thin, uniform pieces. Arrange the pear slices in the bottom of a large 9x13 inch rectangular baker, fanning them out in neat rows to ensure even cooking throughout the dish.Look for The pears should be arranged in tight, overlapping rows covering the entire bottom of the baking dish.Tip Using ripe but firm pears helps them maintain their shape while becoming tender during the baking process.
The pears should be neatly arranged in rows, filling the bottom of the pan completely. They should be uniform in thickness to guarantee even cooking. Check that no large gaps are left, as this will help the syrup distribute evenly during the baking phase.
Glazing and Assembly
- Apply the Glaze and ToppingIn a small bowl, whisk together the melted butter, brown sugar, and ground cinnamon until smooth. Drizzle this mixture evenly over the fanned pear slices. Carefully place the pieces of refrigerated biscuit dough on top of the pears, spacing them out to allow room for rising while baking.Look for The brown sugar and butter mixture should coat all the pears, and the biscuits should be distributed evenly across the surface.Tip Ensure the butter is thoroughly melted so the sugar dissolves into a smooth syrup that reaches every pear slice.
The brown sugar and butter mixture must be thoroughly whisked to combine the cinnamon evenly. Once drizzled, the syrup should coat all pear slices.
The biscuits should be placed deliberately, ensuring they are not touching, to allow the heat to circulate properly during the baking process.
Final Bake
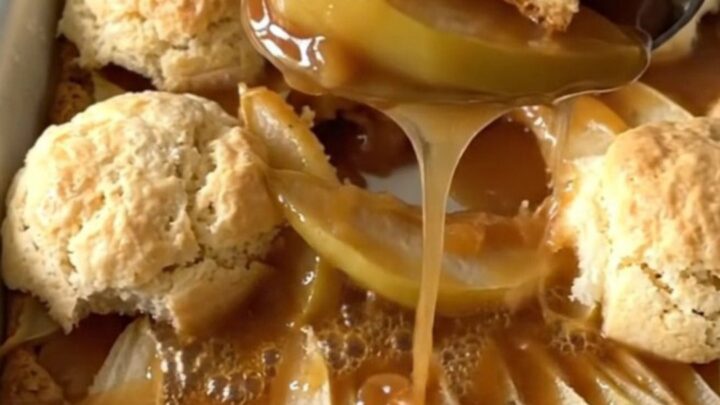
- Bake and ServePlace the baker in the preheated oven and bake for 30 to 35 minutes. Monitor the progress until the biscuits are golden brown and the pear syrup is bubbling vigorously around the edges of the dish. Remove from the oven and let it rest for 10 minutes before serving warm.Look for The biscuits must be golden brown on top, and the syrup should be thick and bubbling at the edges of the pan.Tip If the biscuits brown too quickly, cover the dish loosely with aluminum foil for the final minutes of baking.
The final indicator of success is the appearance of the bubbling syrup and the deep golden color of the biscuits. The aroma should be sweet and spiced, filling the kitchen. Ensure the dish is allowed to rest, which helps the syrup thicken slightly before serving.
Common mistakes
A common mistake is slicing the pears too thick, which prevents them from softening adequately while the biscuits bake. Conversely, slicing them too thin can lead to a watery result.
Another error is overloading the top with too many biscuits; ensure there is adequate space between them so they have room to expand and bake through without becoming dense or doughy in the center.
How to tell it’s done
The cobbler is perfectly done when the biscuit topping has puffed up and turned a deep golden brown. The fruit underneath should be soft and tender when pierced with a fork, and the glaze should be bubbling thick and dark around the edges of the pan.
The internal temperature of the fruit itself is less critical than the visual cues of the bubbling syrup and the browned crust.
Up next · Part 3 of 3
2 variations · storage & make-ahead · 3 answers · printable card
Tips, FAQ & printable recipe (Part 3)← Back to the ingredients (Part 1)