Desserts · Part 2 of 3: Instructions
Brown Butter S’mores Skillet Blondie with Graham Crust Step-by-step instructions
- Prep
- Cook
- Total
- Serves
- 8
Before you start
Before starting, preheat the oven to 350°F (175°C). Measure out all ingredients. For the graham crust, crush the crackers into fine crumbs using a food processor or a rolling pin. Have the butter melted and slightly cooled for the crust.
For the brown butter, cut the butter into pieces so it melts evenly. Line a baking sheet with foil to place under the skillet during broiling to catch any drips. Set out the chocolate bars and marshmallows so they’re ready to add as soon as the blondie comes out of the oven.
Ingredients at a glance (12)
- 1 cup graham cracker crumbs
- 3 tbsp unsalted butter, melted
- 115 g unsalted butter
- 1 cup brown sugar
- 1 large egg
- 1 large egg yolk
- 1 cup all-purpose flour
- 1/2 tsp baking powder
- 100 g chocolate chunks
- 2 bars milk chocolate, broken into pieces
- 1 1/2 cups mini marshmallows
- Vanilla ice cream, for serving
Instructions
Crust and Batter
- Make the Graham CrustIn a small bowl, mix the graham cracker crumbs with the melted butter until evenly moistened. Press the mixture firmly into the bottom of an 8-inch cast iron skillet, forming an even layer that covers the entire base. Set the skillet aside while preparing the blondie batter.Look for The crust should hold together when pressed, with a sandy, cohesive texture.Tip Press the crust with the bottom of a measuring cup for an even, compact layer.
- Brown the ButterIn a medium saucepan over medium heat, melt the 115 g of butter. Continue cooking, swirling occasionally, until the butter foams and then turns a deep golden brown, with a nutty aroma. Watch carefully to avoid burning. Remove from heat and let cool slightly.Look for The butter will foam, then the milk solids will turn amber and smell nutty.Tip Use a light-colored pan to see the color change clearly.
At the end of this phase, you should have a pressed graham cracker crust in the skillet and a thick, glossy blondie batter. The crust should hold together when pressed, and the batter should smell of brown butter and caramel. The batter will be thick and slightly sticky, with chocolate chunks evenly distributed. Make sure the crust is evenly covered with batter, smoothing the top with a spatula.
Baking the Blondie
- Mix the Blondie BatterIn a large bowl, whisk the browned butter with the brown sugar until well combined. Whisk in the egg and egg yolk until smooth. Add the flour and baking powder, and stir with a rubber spatula until just combined. Fold in the chocolate chunks.Look for The batter will be thick, glossy, and smell of caramel and brown butter.Tip Do not overmix once the flour is added; a few streaks are fine.
- Assemble and BakeSpread the blondie batter evenly over the graham crust in the skillet. Bake at 350°F (175°C) for 18 minutes, until the edges are set and the center is just slightly soft but not wet. The blondie should be golden brown and pulling away from the sides slightly.Look for The top will be shiny and cracked, and the edges will look set.Safe temperature 160°F (71°C) internal temperature (egg dishes)Tip Bake on the center rack for even browning.
After 18 minutes in the oven, the blondie should be golden brown at the edges and just set in the center. The top will have a shiny, cracked surface, and the edges will pull away from the skillet slightly.
A toothpick inserted into the center should come out with moist crumbs, not raw batter. The kitchen will smell of toasted butter and chocolate. Let the blondie cool for a minute before adding toppings.
Topping and Broiling
- Top and BroilRemove the skillet from the oven. Immediately scatter the broken chocolate bars over the hot blondie, then top with the mini marshmallows. Turn the oven to broil and place the skillet under the broiler for 2 minutes, until the marshmallows are puffed and toasted golden brown. Watch closely to prevent burning.Look for The marshmallows will puff and turn golden with dark spots; the chocolate will melt.Tip Keep the skillet about 6 inches from the broiler element for even toasting.
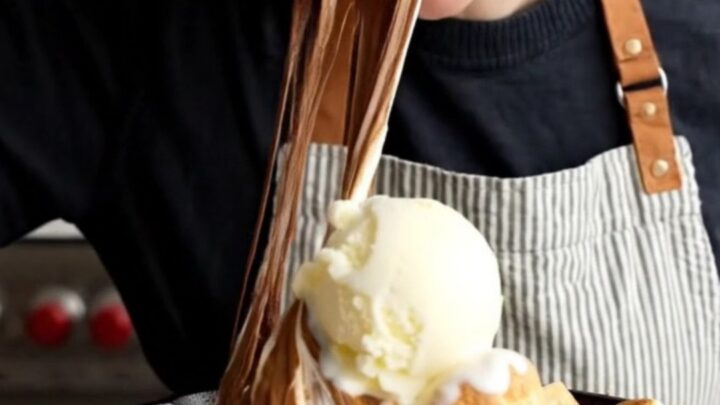
- ServeLet the blondie cool for 5 minutes before serving. Scoop a large spoonful, pulling up gooey marshmallow strands, and top with a scoop of vanilla ice cream if desired. Serve warm.Look for The marshmallows are golden and stretchy; the blondie is gooey and warm.Tip Use a large spoon to get layers of crust, blondie, chocolate, and marshmallow.
Once the chocolate bars and marshmallows are added, the skillet goes under the broiler. Watch closely as the marshmallows puff and turn golden brown with dark spots. The chocolate will melt into a glossy layer. The marshmallows should be toasted, not burnt, and the whole top should look invitingly gooey. Remove the skillet from the broiler and let it rest for a few minutes before serving.
Common mistakes
A common mistake is overbaking the blondie, which makes it dry and cakey instead of gooey. Check it at 16 minutes and rely on visual cues rather than the full time if your oven runs hot. Another mistake is not pressing the graham crust firmly enough, leading to a crumbly base that falls apart.
Use the bottom of a measuring cup to compact it well. When broiling the marshmallows, watch constantly—they can go from golden to burnt in seconds. Also, don’t skip the brown butter; it’s the flavor foundation of the blondie.
How to tell it’s done
The blondie is done when the edges are set and golden brown, and the center is just slightly soft but not wet. A toothpick inserted into the center should come out with a few moist crumbs, not raw batter.
The internal temperature of the blondie should reach 160°F (71°C) to ensure the eggs are fully cooked. After broiling, the marshmallows should be puffed and toasted with golden brown spots. Let the skillet cool for 5 minutes before serving to allow the blondie to set slightly, making it easier to scoop.
- Egg dishes: 160°F (71°C) in the thickest part
Up next · Part 3 of 3
4 variations · storage & make-ahead · 5 answers · printable card
Tips, FAQ & printable recipe (Part 3)← Back to the ingredients (Part 1)