Desserts · Part 1 of 3: Ingredients
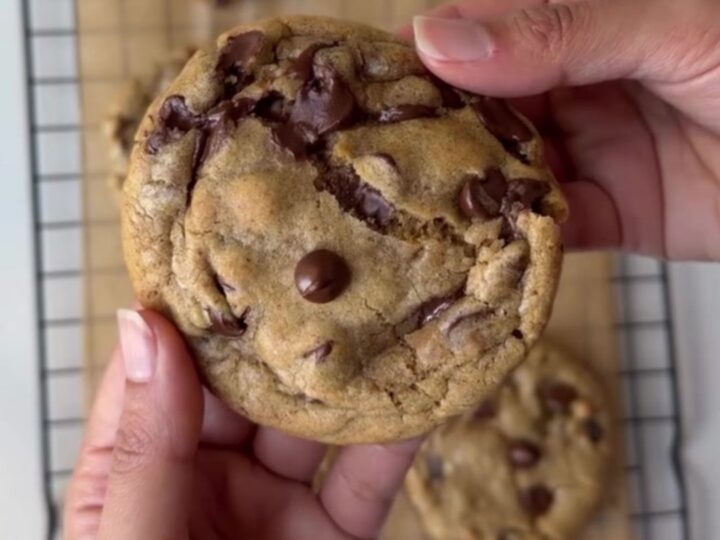
Brown Butter Chocolate Chip Cookies with Gooey Centers
- Prep
- Cook
- Total
- Serves
- 24
There's a moment when you crack open a warm chocolate chip cookie and the center gives way to a molten river of chocolate. These brown butter chocolate chip cookies deliver that moment every single time.
The edges are crisp and caramelized, the middle is tender and gooey, and every bite carries a deep, nutty flavor that only browned butter can provide. A short freeze before baking is the secret to thick, bakery-style cookies that hold their shape and keep their soft centers.
This recipe takes the classic chocolate chip cookie and elevates it with one simple technique: browning the butter. The milk solids in the butter toast to a deep amber, releasing a nutty aroma that perfumes the entire dough. The result is a cookie with a complexity that plain butter can't match.
The dough comes together quickly, then a 30-minute freeze ensures the cookies bake up thick with crisp edges and a soft, gooey center. Using a high ratio of brown sugar adds moisture and chew, while a sprinkle of flaky salt on top (optional) balances the sweetness. These cookies are best enjoyed warm, when the chocolate is still melty and the texture is at its peak.
Ingredients
- 1/2 cup unsalted butter
- 3/4 cup granulated sugar
- 3/4 cup packed light brown sugar
- 1 large egg
- 1 tsp vanilla extract
- 1 1/2 cups all-purpose flour
- 1/2 tsp baking soda
- 1/2 tsp kosher salt
- 1 1/2 cups semisweet chocolate chips, plus extra for topping
Why this recipe works
Browning the butter is the cornerstone of this recipe. As the butter heats, the water evaporates and the milk solids toast, creating compounds that taste nutty, caramelized, and deeply savory.
This adds a layer of flavor that plain creamed butter simply cannot achieve. The browning also reduces the water content, which means less gluten development and a more tender crumb.
The 30-minute freeze is equally important. Cold dough spreads less in the oven, so the cookies stay thick and chewy rather than flat and crispy.
The chilled butter and chocolate also slow the baking process, allowing the edges to set and caramelize while the center remains soft and underbaked. This contrast of textures—crisp outside, gooey inside—is the hallmark of a perfect chocolate chip cookie.
Notes and substitutions
Use a good-quality semisweet chocolate chip or a chopped dark chocolate bar for the best flavor and melt. The chips hold their shape during baking, but chopped chocolate creates larger pools of molten chocolate. For a more intense chocolate flavor, use 60-70% cacao chocolate. If you prefer a milder sweetness, reduce the granulated sugar to 1/2 cup.
The dough can be made ahead and stored in the refrigerator for up to 3 days, or in the freezer for up to 3 months. When baking from frozen, add 1-2 minutes to the baking time. For even baking, use a cookie scoop to ensure uniform size. If you don't have a scoop, use a tablespoon and roll the dough into balls with your hands.
- semisweet chocolate chips: dark chocolate chunks or chopped chocolate bars for larger pockets of melted chocolate.
- unsalted butter: salted butter; reduce the added kosher salt to 1/4 teaspoon.
- all-purpose flour: gluten-free all-purpose flour blend for a gluten-free version (ensure it contains xanthan gum).
Equipment
- small saucepan
- large mixing bowl
- whisk
- wooden spoon or spatula
- baking sheets
- parchment paper
- cookie scoop or tablespoon
- wire rack
Up next · Part 2 of 3
8 steps · 12 min of cooking · what to look for at each stage
Step-by-step instructions (Part 2)