Desserts · Part 2 of 3: Instructions
Brown Butter Cheesecake Brownies: Dangerously Fudgy Step-by-step instructions
- Prep
- Cook
- Total
- Serves
- 16
Before you start
Before starting, measure all ingredients and bring the cream cheese and eggs to room temperature for about 30 minutes. Line an 8x8-inch baking pan with parchment paper, leaving overhang on two opposite sides to make lifting the brownies out easy.
Preheat the oven to 350°F (175°C) when you're ready to bake. Have a small saucepan ready for browning the butter, and two mixing bowls—one for the brownie batter and one for the cheesecake swirl.
Ingredients at a glance (13)
- 1/2 cup unsalted butter
- 1/4 cup Dutch-process cocoa powder
- 4 oz dark chocolate (60-70%), chopped
- 1 cup granulated sugar
- 2 large eggs
- 1 tsp vanilla extract
- 3/4 cup all-purpose flour
- 1/2 tsp salt
- 1/2 cup chocolate chips
- 8 oz cream cheese, softened
- 1/4 cup granulated sugar
- 1 large egg yolk
- 1/2 tsp vanilla extract
Instructions
Batter and Swirl
- Brown the Butter and Mix the Brownie BatterIn a small saucepan, melt the butter over medium heat. Continue cooking, swirling occasionally, until the butter turns golden brown and smells nutty, about 3-4 minutes. Remove from heat and let cool slightly. In a large bowl, whisk the brown butter with the cocoa powder, chopped dark chocolate, sugar, eggs, and vanilla until glossy and smooth. Fold in the flour and salt until just combined. Stir in the chocolate chips.Look for The butter should be deep golden with a nutty aroma, and the batter should be glossy and thick.Tip Watch the butter closely—it can go from browned to burnt quickly. Remove it from the heat as soon as it smells nutty.
- Make the Cheesecake SwirlIn a separate bowl, beat the softened cream cheese with the sugar, egg yolk, and vanilla until smooth and creamy.Look for The mixture should be completely smooth with no lumps.Tip Ensure the cream cheese is truly softened to avoid lumps.
At this point, you should have a glossy, thick brownie batter and a smooth, creamy cheesecake mixture. The brown butter should be fragrant and nutty, and the chocolate fully melted. The batter will be thick and slightly shiny.
The cheesecake mixture should be smooth with no lumps. Before moving on, taste a tiny bit of the brownie batter (if you don't mind raw eggs) to check the sweetness and chocolate intensity.
Baking
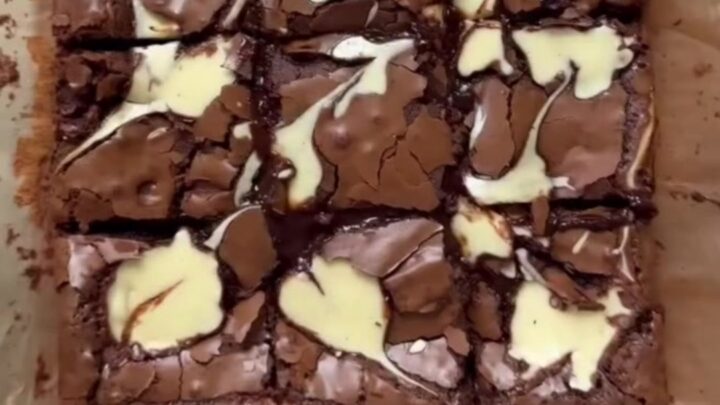
- Assemble the BrowniesPreheat the oven to 350°F (175°C). Line an 8x8-inch baking pan with parchment paper, leaving overhang on two sides. Pour the brownie batter into the pan and spread evenly. Drop spoonfuls of the cheesecake mixture over the top. Use a knife or skewer to swirl the cheesecake into the brownie batter, creating a marbled pattern.Look for The top should show distinct swirls of cheesecake and brownie batter.Tip Don't over-swirl—you want distinct pockets of cheesecake for a marbled effect.
- Bake the BrowniesBake for 25 minutes, until the edges are set and the top is shiny and slightly cracked. A toothpick inserted into the center should come out with a few moist crumbs, not wet batter. The center will continue to set as it cools.Look for The edges will look firm, and the top will have a slight sheen. The center should be moist but not raw.Safe temperature 160°F (71°C) internal temperature (egg dishes)Tip Start checking at 22 minutes—ovens vary. The brownies are done when the edges pull away slightly from the pan.
The brownies are baking when your kitchen fills with a rich chocolate and nutty aroma. After 25 minutes, the edges will be set, and the top will have a shiny, crackly crust. A toothpick inserted into the center will come out with moist crumbs. The cheesecake swirl will be set but still slightly soft. The brownies should look slightly puffed but not domed.
Cooling and Cutting
- Cool and SliceLet the brownies cool in the pan on a wire rack for at least 30 minutes. Once cool, lift the brownies out using the parchment overhang. Cut into 16 squares with a sharp knife, wiping the knife clean between cuts.Look for The brownies should be firm enough to cut cleanly, with a fudgy, moist interior.Tip For cleaner slices, chill the brownies for 15 minutes before cutting.
Once cooled, the brownies will have firmed up. The top will be crackly, and the edges will be slightly crisp. When you cut into them, the interior should be dense and fudgy, with distinct swirls of cheesecake. The chocolate chips will be melted and gooey. The texture should be moist and rich, not cakey. Cut cleanly with a sharp knife, wiping it between cuts for neat squares.
Common mistakes
One common mistake is overbaking, which results in dry, cakey brownies. Start checking at 22 minutes and rely on the toothpick test—moist crumbs are perfect.
Another pitfall is overmixing the brownie batter after adding the flour, which develops gluten and makes the brownies tough. Mix until just combined. When swirling the cheesecake, be gentle and don't over-swirl, or the layers will merge into a single color.
How to tell it’s done
The brownies are done when the edges are set and pull away slightly from the pan, and the top is shiny and slightly cracked. A toothpick inserted into the center should come out with a few moist crumbs clinging to it, not wet batter.
The internal temperature should reach 160°F (71°C) to ensure the eggs are fully cooked. The center will firm up as it cools, so don't overbake—you want the fudgy texture.
- Egg dishes: 160°F (71°C) in the thickest part
Up next · Part 3 of 3
4 variations · storage & make-ahead · 5 answers · printable card
Tips, FAQ & printable recipe (Part 3)← Back to the ingredients (Part 1)