Desserts · Part 1 of 3: Ingredients
Brown Butter Cheesecake Brownies: Dangerously Fudgy
- Prep
- Cook
- Total
- Serves
- 16
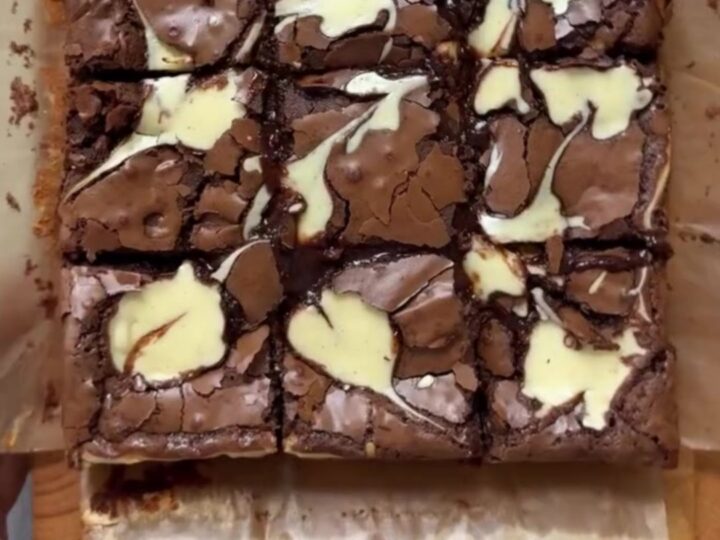
These brown butter cheesecake brownies are the definition of dangerously fudgy. A dense, moist chocolate base with a creamy cheesecake swirl, all elevated by the nutty richness of browned butter. The contrast of textures and flavors makes each bite unforgettable.
Perfect for a decadent dessert, a special treat, or just because you deserve something extraordinary. This recipe is straightforward, yet the result is spectacular: glossy, fudgy, and utterly irresistible. Get ready to bake the best brownies of your life.
Brown butter is the secret to taking brownies from good to absolutely unforgettable. As the butter cooks, its milk solids toast and develop a deep, nutty aroma that infuses the entire batter. Combined with Dutch cocoa and dark chocolate, this creates a brownie that is intensely chocolatey and moist, with a texture that borders on truffle-like.
The cheesecake swirl adds a tangy, creamy counterpoint that makes each bite a delight. This recipe is designed for home bakers: simple steps, familiar ingredients, and a foolproof method. Whether you're a seasoned baker or just starting, these brownies will impress.
Ingredients
- 1/2 cup unsalted butter
- 1/2 cup Dutch-process cocoa powder
- 4 oz dark chocolate (70%), chopped
- 1 cup granulated sugar
- 2 large eggs
- 1 tsp vanilla extract
- 3/4 cup all-purpose flour
- 1/4 tsp salt
- 1/2 cup chocolate chips
Cheesecake swirl
- 8 oz cream cheese, softened
- 1/4 cup granulated sugar
- 1 large egg yolk
Why this recipe works
Browning the butter is a game-changer. It not only adds a rich, nutty flavor but also removes some water from the butter, which helps create a denser, fudgier texture.
The Maillard reaction that occurs during browning produces hundreds of flavor compounds that deepen the chocolate taste, making the brownies taste more complex and sophisticated than ordinary versions.
Using both Dutch-process cocoa and dark chocolate ensures a deep, rich chocolate flavor without being overly sweet. The Dutch cocoa is less acidic, providing a smooth, mellow base, while the dark chocolate adds intensity and a slight bitterness that balances the sugar.
The cheesecake swirl, made with cream cheese, sugar, and egg yolk, adds a creamy, tangy layer that contrasts beautifully with the dense brownie.
Notes and substitutions
For the best results, use high-quality Dutch-process cocoa and dark chocolate with at least 70% cacao. The chocolate chips can be semi-sweet or dark, depending on your preference. If you don't have Dutch cocoa, you can use natural cocoa, but the flavor will be slightly different. Make sure the cream cheese is at room temperature to avoid lumps in the swirl.
You'll need an 8x8-inch baking pan, parchment paper, and a few mixing bowls. If you don't have a small saucepan for browning the butter, a regular skillet works fine. The key is to watch the butter carefully and remove it from the heat as soon as it turns amber and smells nutty. Overbrowning can make it bitter, so err on the side of caution.
- Dutch-process cocoa powder: Unsweetened natural cocoa powder (the brownies will be slightly less rich and a bit more tangy)
- Dark chocolate (70%): Semi-sweet chocolate chips (reduce the added chocolate chips to 1/4 cup)
- Cream cheese: Full-fat ricotta or mascarpone for a slightly different tang and texture
Equipment
- 8x8-inch baking pan
- Parchment paper
- Mixing bowls
- Whisk
- Rubber spatula
- Small saucepan
Up next · Part 2 of 3
6 steps · 25 min of cooking · what to look for at each stage
Step-by-step instructions (Part 2)