Dinner · Part 2 of 3: Instructions
Buffalo Blue Cheese Smash Burgers with Celery Slaw Step-by-step instructions
- Prep
- Cook
- Total
- Serves
- 2
Before you start
Before cooking, set out all ingredients. Whisk the buffalo butter and toss the celery slaw, then refrigerate the slaw. Divide the ground chuck into two loose balls and keep them cold until ready to smash.
Heat the griddle over high heat for at least 5 minutes to ensure it reaches 475°F (246°C). Have the buns split and ready to toast, and the Gorgonzola crumbled within reach.
Ingredients at a glance (8)
- 1/3 cup hot sauce
- 3 tbsp unsalted butter, melted
- 1 tsp garlic powder
- 1/2 cup Gorgonzola crumbles
- 8 oz ground chuck (80% lean)
- 2 brioche buns, split and toasted
- 1 cup thinly sliced celery hearts with leaves
- 1/4 cup ranch dressing
Instructions
Prep the Flavor Base
- Make the Buffalo Butter and Celery SlawIn a small bowl, whisk together the hot sauce, melted butter, and garlic powder until fully combined. Set aside. In a separate bowl, toss the sliced celery with the ranch dressing until evenly coated. Refrigerate the slaw while you cook the burgers.Look for The buffalo butter is smooth and glossy; the slaw is lightly dressed.Tip Chill the slaw for a crisper texture and cooler contrast to the hot burger.
- Form the Ground Chuck PattiesDivide the ground chuck into two 4-ounce portions. Gently shape each into a loose ball, handling the meat as little as possible. Do not season yet; the buffalo butter and Gorgonzola add plenty of salt.Look for The balls are loose but hold together.Tip Overworking the meat makes burgers dense; keep it light.
The buffalo butter is a glossy, reddish-orange emulsion with a punchy aroma. The celery slaw is lightly dressed, with the ranch clinging to the slices without pooling. The ground chuck balls are cold and hold their shape. Everything is within arm’s reach of the stove.
Smash, Sear, and Melt
- Heat the Griddle and Smash the PattiesHeat a cast-iron griddle or heavy skillet over high heat until it reaches 475°F (246°C). Place the meat balls on the hot surface and immediately press them flat with a metal spatula, using firm pressure for about 10 seconds. Cook for 90 seconds without moving.Look for The patties are thin with craggy edges and sizzling loudly.Tip If the spatula sticks, use a sheet of parchment to press without tearing the crust.
- Flip and Add the GorgonzolaFlip the patties with the spatula. Immediately sprinkle half of the Gorgonzola crumbles over each patty. Press the cheese gently into the surface with the spatula. Cook for another 60 to 90 seconds, until the cheese blisters and the patties reach 160°F (71°C).Look for The cheese is melted and browned in spots; the patties are deeply seared.Safe temperature 160°F (71°C) internal temperature (ground meat)Tip Resist moving the patties after flipping; the crust needs contact to stay crisp.
- Drizzle with Buffalo ButterSpoon or brush the buffalo butter over the cheese-topped patties. Let it sizzle into the crust for about 15 seconds. Remove the patties from the griddle and set them on a plate.Look for The butter bubbles and darkens slightly on the cheese.Tip Use a pastry brush for even coverage without drowning the patty.
- Toast the Brioche BunsPlace the split brioche buns cut-side down on the hot griddle. Toast for 30 to 45 seconds, until golden and lightly crisped. Remove and set aside.Look for The buns are golden with a light crunch.Tip Toast in the residual fat from the patties for extra flavor.
The griddle is smoking hot, and the patties sizzle loudly as they smash. After 90 seconds, the edges are lacy and deep brown. Flipping reveals a crust that releases easily.
The Gorgonzola melts and blisters, creating golden-brown spots. The buffalo butter sizzles on contact, and the kitchen smells like a pub kitchen.
Assemble and Serve
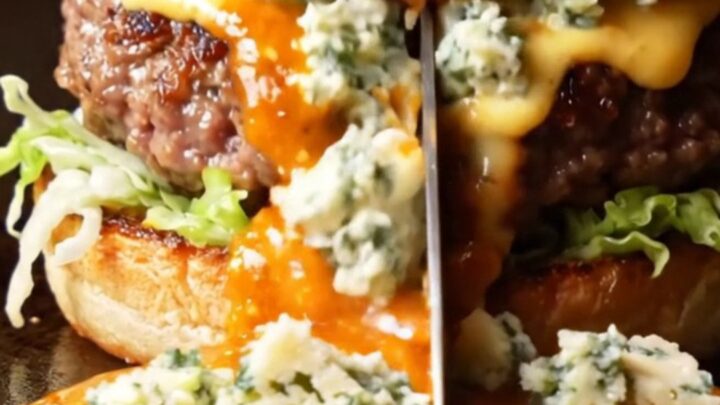
- Assemble the BurgersPlace the bottom buns on plates. Top each with a patty, then pile the celery slaw over the patty. Cap with the top bun. Slice the burgers in half if desired, letting the buffalo butter and cheese ooze out.Look for The slaw is crisp and the cheese is molten.Tip Serve immediately so the buns stay crisp and the cheese stays hot.
The buns are toasted with golden edges. The patties sit on the bottom buns, topped with a mound of crisp celery slaw. The top bun is in place, and when sliced, the buffalo butter and cheese ooze out slowly. The burger is tall, glossy, and ready to eat immediately.
Common mistakes
The most common mistake is pressing the patties too hard or too long, which squeezes out juices and makes them dry. Press firmly for 10 seconds, then stop. Another pitfall is moving the patties before the crust forms—let them cook undisturbed for the full 90 seconds.
Overloading the griddle drops the temperature, so cook in batches if needed. Finally, don’t skip toasting the buns; a soft bun will turn soggy from the buffalo butter.
How to tell it’s done
The burgers are done when the internal temperature reaches 160°F (71°C) on an instant-read thermometer inserted into the side of the patty. The crust should be deeply browned and the cheese blistered in spots.
If you prefer a pinker center, note that ground beef must reach 160°F for safety. The buns are toasted when golden and crisp, and the slaw is ready when the celery is coated but still crunchy.
- Ground meat: 160°F (71°C) in the thickest part
Up next · Part 3 of 3
4 variations · storage & make-ahead · 5 answers · printable card
Tips, FAQ & printable recipe (Part 3)← Back to the ingredients (Part 1)