Desserts · Part 2 of 3: Instructions
Blood Orange Ricotta Almond Cake with Glossy Glaze Step-by-step instructions
- Prep
- Cook
- Total
- Serves
- 10
Before you start
Gather everything before you start, because the batter comes together quickly once the ricotta is grated. Let the butter and eggs sit at room temperature for about 30 minutes so they blend without seizing. Drain the ricotta in a fine sieve for 15 minutes, pressing gently to remove the excess whey. Heat the oven to 350°F (175°C) and set the rack in the center.
Butter the pan and line its base with parchment, cutting the paper to fit. Slice the blood oranges into thin rounds, pat them dry with paper towels, and keep them flat on a tray until you arrange them. Chop the almonds roughly, toast the hazelnuts until they smell nutty, and set aside the whole almonds, halved almonds and rosemary for the finish.
Ingredients at a glance (14)
- 2 blood oranges, halved and thinly sliced
- 1/2 cup unsalted butter, softened, plus more for the pan
- 3/4 cup granulated sugar
- 3 large eggs, at room temperature
- 1 1/2 cups whole-milk ricotta cheese, drained and grated on a box grater
- 1 1/4 cups all-purpose flour
- 1/2 cup whole almonds, roughly chopped, plus more for topping
- 1 tsp baking powder
- 1 tsp finely grated blood orange zest
- 1 sprig fresh rosemary, for garnish
- 1 cup confectioners' sugar
- 2 tbsp fresh blood orange juice
- 1/4 cup whole and halved hazelnuts, toasted
- 1/4 cup whole almonds
Instructions
Arrange and mix the batter
- Prepare the pan and orangesHeat the oven to 350°F (175°C). Butter a 9-inch round pan, line the base with parchment, and arrange the blood orange slices in overlapping rows across the bottom. Set the chopped almonds, rosemary and hazelnuts within reach.Look for Orange slices overlap evenly across the base with no gaps.Tip Pat the slices dry so they stick to the pan and do not weep into the batter.
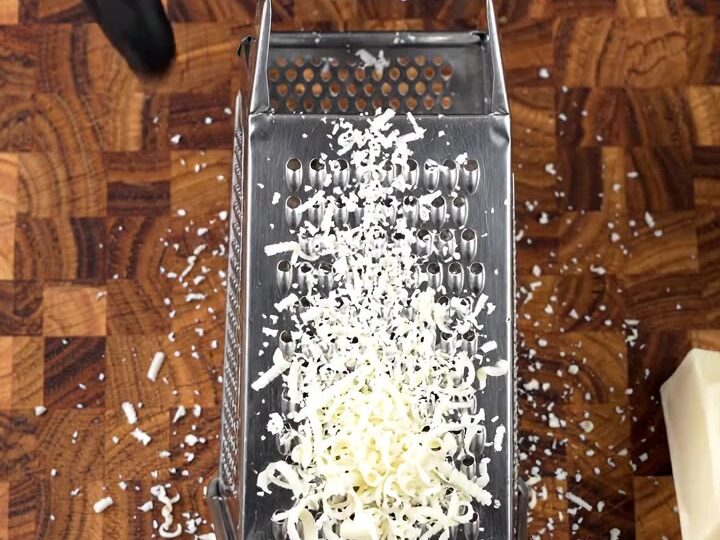
- Grate the ricottaDrain the ricotta well, then grate it on the large holes of a box grater so it falls as fine, light curds onto the board. Grated ricotta blends smoother and bakes into a finer crumb than spooned ricotta.Look for Fine, fluffy white curds collect on the board.Tip Drain in a sieve for 15 minutes to remove excess whey.
The orange slices sit in an even, overlapping layer across the pan base, with no gaps where the batter could seep through. The butter and sugar have turned pale and fluffy after beating, and the eggs have been added one at a time so the mixture looks smooth and glossy rather than split.
Once the grated ricotta, flour and baking powder are folded in, the batter should look thick, pale yellow and uniform, with no streaks of dry flour or lumps of cheese. Check the texture by lifting the spatula: the batter should fall slowly in a ribbon. If it looks grainy, beat a few more seconds before pouring it over the fruit so the cake bakes evenly.
Bake until golden and set
- Beat the butter and sugarBeat the softened butter and sugar in a large bowl until pale and fluffy, about 3 minutes. Add the eggs one at a time, beating well after each, then stir in the orange zest.Look for The mixture looks pale, light and fluffy.Tip Bring the eggs to room temperature so the batter stays smooth.
- Mix the ricotta batterFold in the grated ricotta until combined. Whisk the flour and baking powder, then fold them in gently with a spatula until no dry streaks remain. Do not overmix.Look for The batter is smooth, thick and pale yellow.Tip Stop folding as soon as the flour disappears to keep the crumb tender.
- Fill and bake the cakePour the batter over the orange slices, spreading it level. Scatter the chopped almonds over the top. Bake until golden and a toothpick inserted in the center comes out clean, about 50 minutes.Look for The top turns golden and the edges pull slightly from the pan.Safe temperature 160°F (71°C) internal temperature (egg dishes)Tip Cover loosely with foil if the top browns too fast.
After about 50 minutes, the top of the cake should have turned a warm golden color, and the edges should be pulling slightly away from the pan. Gently press the center: it should spring back and feel firm rather than soft or sunken. A toothpick inserted into the middle should come out clean, or with only a few dry crumbs attached. The kitchen will smell of toasted almonds and citrus. If the top darkens faster than the rest of the cake, tent it loosely with foil and continue baking until the center is set and no longer shines with wet batter.
Invert and glaze the cake
- Cool and invert the cakeLet the cake cool in the pan for 15 minutes, then run a knife around the edge and invert it onto a wire rack. Peel off the parchment and let the cake cool completely, about 30 minutes.Look for The cake releases cleanly from the pan and the orange layer shows on top.Tip Invert onto a rack set over a tray to catch any drips.
- Make the blood orange glazeWhisk the confectioners' sugar with the blood orange juice until smooth and thick but pourable. Spoon the glaze over the cake so it runs down the sides, then top with the whole and halved almonds, hazelnuts and rosemary sprig.Look for The glaze is glossy and coats the back of a spoon.Tip Add juice a few drops at a time to adjust thickness.
- Slice and serveLet the glaze set for about 10 minutes. Cut the cake into wedges with a sharp knife, wiping the blade between cuts, and serve each slice with its glazed edge and toasted nuts.Look for The glaze is set and the slice shows a golden sponge with creamy ricotta.Tip Warm the knife under hot water for clean slices.
Let the cake rest in the pan for 15 minutes so it firms up enough to release. Run a thin knife around the edge, then invert it carefully onto a rack. The blood orange slices should now show as a bright, slightly caramelized pattern on top, and the parchment should peel away easily. Once the cake is fully cool, the glaze should be thick enough to coat the back of a spoon and fall in a slow, glossy stream. Spoon it over the top and let it run down the sides. Scatter the almonds, hazelnuts and rosemary on the glaze while it is still tacky so they stay in place.
Common mistakes
The most common problem is a batter that is too wet, usually because the ricotta was not drained. Excess whey thins the mixture, and the cake can bake unevenly or sink in the center. Drain the cheese well and grate it so it blends without leaving pockets of liquid.
Overmixing after adding the flour is another frequent error; it develops gluten and produces a tight, rubbery crumb instead of a tender one. Fold just until the flour disappears. Do not skip the parchment, and do not invert the cake before it has rested, or the orange layer can stick and tear. Finally, if the glaze is too thin, it will soak in rather than shine.
How to tell it’s done
The cake is done when the top is golden, the edges have pulled slightly from the pan, and a toothpick inserted in the center comes out clean or with only a few moist crumbs. The center should spring back when gently pressed.
Because this cake is made with eggs and dairy rather than meat, the usual test is texture and color, not a thermometer; the crumb should be set, moist and tender through the middle. Cool the cake completely before glazing so the coating stays glossy and does not melt into the sponge. A cake that wobbles in the center or still looks wet on the surface needs another five to ten minutes in the oven.
- Egg dishes: 160°F (71°C) in the thickest part
Up next · Part 3 of 3
4 variations · storage & make-ahead · 5 answers · printable card
Tips, FAQ & printable recipe (Part 3)← Back to the ingredients (Part 1)