Desserts · Part 1 of 3: Ingredients
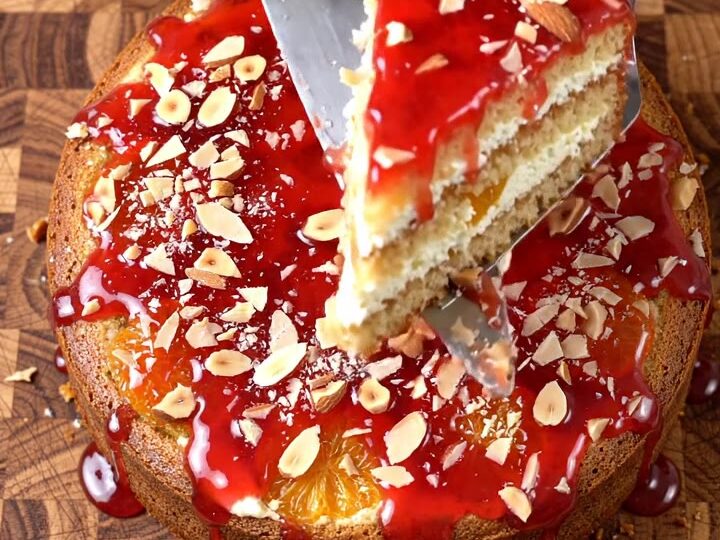
Blood Orange Almond Ricotta Cake with White Chocolate
- Prep
- Cook
- Total
- Serves
- 10
This blood orange almond ricotta cake turns a handful of winter citrus into a showstopping dessert. Thin slices of ruby blood orange line the bottom of the pan, so when the cake bakes and inverts, they form a jewel-like crown.
The crumb is tender and moist thanks to ricotta and almond flour, while grated white chocolate melts into buttery pockets. A glossy blood orange glaze and toasted almonds finish it with a elegant crunch.
Blood oranges have a short, glorious season, and this cake makes the most of their color and tangy-sweet flavor. The batter comes together quickly in one bowl, with no fancy equipment. Ricotta keeps the crumb exceptionally moist, while almond flour adds a delicate nuttiness.
The white chocolate, grated into fine curls, disappears into the batter and reappears as creamy specks. Baked upside down, the orange wheels caramelize slightly and become the star of the show.
Ingredients
- 3 blood oranges, thinly sliced into wheels
- 3/4 cup sliced almonds, divided
- 4 oz white chocolate (couverture), grated
Cake Batter
- 1 cup whole-milk ricotta
- 1 tbsp lemon zest
- 2 tbsp lemon juice
- 1 cup almond flour
- 1 cup all-purpose flour
- 1 1/2 tsp baking powder
- 1/2 tsp kosher salt
- 1/2 cup unsalted butter, softened
- 3/4 cup granulated sugar
- 3 large eggs
- 1 tsp vanilla extract
Glaze
- 1 cup confectioners' sugar
- 2 tbsp blood orange juice
Why this recipe works
The ricotta and almond flour work together to create a tender, almost custardy crumb that stays moist for days. Ricotta adds richness without heaviness, and almond flour provides structure and a subtle nutty flavor. The white chocolate, grated fine, melts into the batter, creating pockets of sweetness that balance the tart blood oranges.
Baking the cake upside down with the orange wheels on the bottom allows the fruit to soften and release its juices, which then soak back into the cake as it cools.
The juices also mingle with the sugar in the batter, creating a natural syrup that glazes the top. Inverting the cake while warm ensures the oranges release cleanly and stay beautifully arranged.
Notes and substitutions
Look for blood oranges that feel heavy for their size and have a deep red blush on the skin. If blood oranges are unavailable, regular oranges work, though the color will be less dramatic.
The white chocolate should be a good-quality couverture or a high-percentage white chocolate bar; avoid white chocolate chips, as they often contain stabilizers that prevent smooth melting.
Whole-milk ricotta gives the best texture; part-skim will work but the cake may be slightly drier. Almond flour is available in most supermarkets; if you only have almond meal, sift it to remove large pieces. The cake is best served the day it is made, but it keeps well for up to three days covered at room temperature.
- blood oranges: regular oranges or a mix of navel oranges and a few slices of cara cara for color
- white chocolate couverture: good-quality white chocolate bar, chopped finely
- whole-milk ricotta: part-skim ricotta or cottage cheese blended until smooth
- almond flour: an equal amount of all-purpose flour (the cake will be slightly less tender)
Equipment
- 9-inch round cake pan
- Box grater
- Electric mixer
- Mixing bowls
- Rubber spatula
- Cooling rack
- Small saucepan
Up next · Part 2 of 3
8 steps · 50 min of cooking · what to look for at each stage
Step-by-step instructions (Part 2)