Desserts · Part 2 of 3: Instructions
Black Forest Chocolate Bark with Almonds and Cherries Step-by-step instructions
- Prep
- Cook
- Total
- Serves
- 12
Before you start
Gather everything before you start, because the bark moves quickly once the chocolate is grated. Line a metal baking tray with parchment paper so it covers the bottom and the edges, and keep it close to your workspace. Place the wooden board, the large chef's knife, the box grater and the Santoku knife within reach. Put on a pair of food-safe gloves for pressing the toppings.
Measure the almonds, the dried cherries, the dark chocolate and the white chocolate, and set aside a portion of the cherries and almonds for the top. Chill the block of dark chocolate for about 10 minutes so it grates cleanly rather than smearing. Clear a flat, dry area of the counter, because any water on the board or tools can make the chocolate seize.
Ingredients at a glance (4)
- 3/4 cup whole almonds, roughly chopped
- 3/4 cup dried cherries, roughly chopped
- 12 oz dark chocolate, in one block, for grating and chopping
- 2 oz white chocolate, in small pieces
Instructions
Chop, grate and spread the base
- Chop the almonds and cherriesChop the whole almonds and the dried cherries on a wooden board with a large chef's knife. Pile the nuts and fruit together, then spread them slightly apart so the pieces stay separate.Look for Almonds in coarse pieces, cherries in small pieces, with no whole nuts left.Tip Chop the cherries separately so their sticky pieces do not clump together.
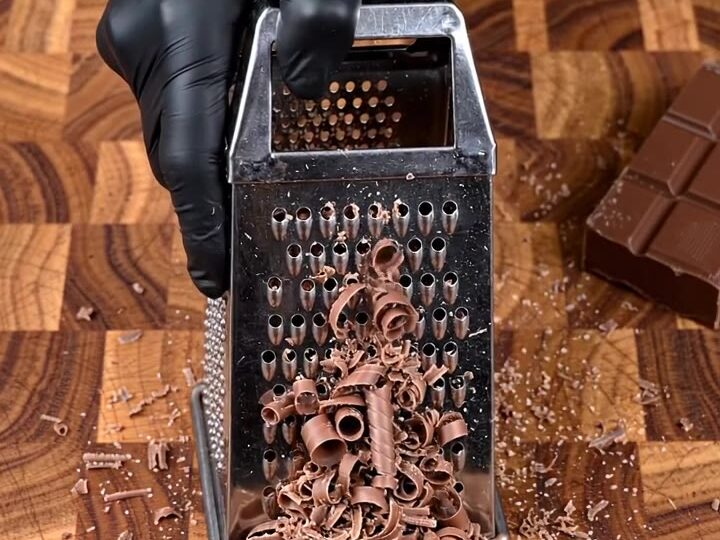
- Grate the dark chocolateHold the block of dark chocolate against the box grater and grate it over the board. Grate some of the chocolate into fine curls and shavings, and chop any remaining pieces into small chunks.Look for A mix of fine shavings and small chunks spread across the board.Tip Chill the chocolate for 10 minutes first so it grates cleanly instead of smearing.
At the end of this phase the almonds and cherries are chopped into irregular pieces, the chocolate is a mix of fine curls and small chunks, and everything is combined in one even layer on the parchment. The nuts and fruit should be distributed evenly with no large clumps of cherries. Check that the layer is about 1/4 inch thick across the whole tray before you move on.
Smell the chocolate and nuts as they blend, since the warm cocoa and toasted almond aroma tells you the mixture is ready. If the layer looks patchy, press the mixture gently with a spatula to even out the thickness before adding the toppings, because the top layer will sit on this base and uneven spots will show in the finished pieces.
Top the bark before it sets
- Combine and spread the mixtureGather the chopped almonds, dried cherries and chocolate pieces in one bowl or on the board and toss them together. Line the metal baking tray with parchment and spread the mixture evenly over it in a thin layer.Look for An evenly mixed layer of chocolate, nuts and fruit covering the parchment.Tip Press the mixture to an even thickness of about 1/4 inch for clean breaks.
- Top with white chocolate and fruitScatter the remaining cherries, chopped almonds and small white chocolate pieces over the surface. Press them gently into the chocolate with gloved hands so they stay in place.Look for Red cherries, almond pieces and white flecks visible across the whole surface.Tip Press lightly so the toppings sink in without breaking the chocolate layer.
At the end of this phase the surface is covered with red cherries, chopped almonds and small white chocolate pieces pressed lightly into the chocolate. Check that the toppings are spread across the whole tray and that none are sitting loose on top, since loose pieces may fall off after the bark sets.
The surface should look glossy where the chocolate shows between the toppings. Press the pieces down with clean gloved hands, not hard enough to crack the layer. A quick look from the side shows whether the toppings are embedded. If any pieces are loose, press them in before the chocolate starts to firm, because it sets quickly once the tray is at rest.
Set and cut the sheet
- Let the bark set firmLeave the tray at cool room temperature, or in the refrigerator for a faster set, until the chocolate is firm, glossy and free of soft spots. This usually takes about 1 hour in the refrigerator.Look for The surface looks glossy and feels firm when pressed lightly, with no soft spots.Tip Keep the tray out of direct sunlight so the chocolate sets with an even gloss.
- Lift and cut the barkLift the parchment out of the tray and set the sheet on the board. Cut it with a Santoku knife into rectangular pieces, wiping the blade between cuts for clean edges.Look for Clean rectangular pieces with smooth surfaces and visible cherries and almonds.Tip Warm the blade slightly under hot water and dry it before each cut for neat edges.
At the end of this phase the bark is firm and glossy, with no soft spots when you press lightly with a fingertip. The chocolate should look smooth and dark between the toppings, and the sheet should lift off the tray without sticking. Check that the parchment comes away easily and that the sheet keeps its shape. Listen for a clean snap when you break the edge of a corner piece, which tells you the chocolate has set through. Cut the sheet on a dry board with the Santoku knife, wiping the blade between cuts so the rectangles have sharp edges and the toppings stay on the pieces.
Common mistakes
The most common problem is adding water or steam to the chocolate. Even a few drops from a wet board, a damp knife or a bowl that has not dried will cause the chocolate to seize and turn grainy, so dry every tool before you start. Grating the chocolate too finely can also cause it to melt unevenly, leaving streaks in the set bark. Spreading the mixture too thickly makes the bark hard to cut cleanly and slow to set, while spreading it too thinly makes the pieces brittle. Press the toppings in at the right moment: if the chocolate has already firmed, they will not stick, and if you press too hard, the surface will crack.
How to tell it’s done
The bark is done when the chocolate has set firm and glossy across the whole tray, with no soft or tacky spots. Press a fingertip lightly on the surface: it should feel solid and should not leave a mark or transfer chocolate to your skin. Give a corner piece a gentle bend. A set bark snaps cleanly rather than flexing, and the cut edges look smooth and shiny.
The cherries and almonds should be held firmly in place with no loose pieces. This recipe contains no raw meat, poultry, fish or eggs, so there is no internal temperature to check. For the best cutting results, let the sheet rest until the chocolate feels cool to the touch and the gloss is even.
Up next · Part 3 of 3
4 variations · storage & make-ahead · 5 answers · printable card
Tips, FAQ & printable recipe (Part 3)← Back to the ingredients (Part 1)