Desserts · Part 2 of 3: Instructions
Better Than Sex Cake with Caramel and Toffee Step-by-step instructions
- Prep
- Cook
- Total
- Serves
- 12
Before you start
Before beginning, ensure all ingredients are at room temperature to facilitate proper mixing and baking. Preheat the oven to the temperature specified on the cake mix box.
Prepare the 9x13 inch casserole dish by lightly greasing it to ensure the cake does not stick during serving.
Have the caramel sauce, heavy cream, and toffee bits ready on the counter. Make sure the electric mixer and mixing bowl are clean and dry for whipping the cream, as any residue can prevent the cream from thickening properly.
Ingredients at a glance (4)
- 1 box chocolate cake mix, prepared according to package directions
- 1 cup caramel sauce, warmed
- 2 cups heavy whipping cream, whipped until stiff peaks form
- 1/2 cup chocolate-toffee bits
Instructions
Baking the Chocolate Sponge
- Prepare the Cake BaseBake the chocolate cake in a 9x13 inch dish according to the package instructions. Ensure the cake reaches an internal temperature of 160°F (71°C) to verify the eggs are fully cooked. Allow the cake to cool completely at room temperature for at least one hour before adding the toppings to prevent melting.Look for The cake springs back when lightly pressed in the center.Safe temperature 160°F (71°C) internal temperature (egg dishes)Tip Poke small holes across the surface of the cake using a wooden skewer to allow the caramel to soak in effectively.
The cake should be perfectly baked, golden brown on the edges, and have a uniform, moist crumb throughout. It needs to be completely cooled to room temperature before any further steps are taken to ensure the structure remains stable.
Infusing with Caramel
- Drizzle with CaramelWarm the caramel sauce gently in a small saucepan until it reaches a pourable consistency. Drizzle the warm caramel in a zigzag pattern evenly across the entire surface of the cooled chocolate cake, ensuring it penetrates the holes created previously.Look for The caramel is smooth and flows easily from the spoon.Tip Do not overheat the caramel, or it may become too thin and lose its rich, sticky texture.
The caramel should be evenly distributed and fully absorbed into the holes of the cake. It should look rich and sticky, coating the top of the sponge without pooling excessively at the bottom of the dish.
Layering and Topping
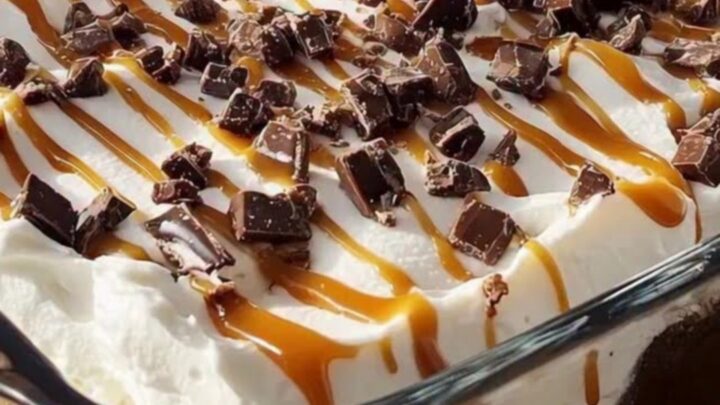
- Add Cream and ToffeeSpread the freshly whipped cream over the caramel layer, creating an even, fluffy surface using a spatula. Immediately sprinkle the chocolate-toffee bits over the top of the cream. Serve chilled for the best texture and flavor profile.Look for The cream is spread into an even layer and the toffee bits are distributed.Tip Whip the cream until stiff peaks form so it holds its shape on top of the cake without sliding.
The whipped cream layer should be smooth, thick, and opaque, completely covering the caramel. The toffee bits should be scattered evenly across the surface, providing an immediate visual cue of the crunch to come.
Common mistakes
A common mistake is applying the caramel while the cake is still piping hot, which can cause the cake to become gummy or overly saturated. Always allow the cake to cool for at least an hour.
Another error is over-whipping the cream, which can turn it into butter; stop as soon as stiff peaks form. Finally, ensure the toffee bits are added at the very last moment to maintain their crunch, as they will soften if left in the refrigerator for too long.
How to tell it’s done
The cake is done when a toothpick inserted into the center comes out with a few moist crumbs. It must reach an internal temperature of 160°F (71°C) to ensure the eggs are fully cooked. The surface should feel firm and spring back when pressed gently.
The caramel should look glossy and deep amber in color, while the whipped cream should hold firm, stiff peaks when lifted with a spatula, ensuring it does not collapse into the caramel layer.
- Egg dishes: 160°F (71°C) in the thickest part
Up next · Part 3 of 3
2 variations · storage & make-ahead · 3 answers · printable card
Tips, FAQ & printable recipe (Part 3)← Back to the ingredients (Part 1)