Dinner · Part 2 of 3: Instructions
Baked Zucchini Lasagna Rolls with Ricotta and Basil Step-by-step instructions
- Prep
- Cook
- Total
- Serves
- 4
Before you start
Gather everything before you start, because the rolls come together quickly once the zucchini is sliced. Set out a chef's knife, a wooden cutting board, a box grater, a mixing bowl, a cast iron skillet and a white ceramic baking dish. Preheat the oven to 375°F (190°C) and place the rack in the upper third so the cheese on top browns without overcooking the sauce underneath.
Pat the zucchini dry after washing, and set the basil leaves on a dry towel so they do not bruise. Mince the garlic, grate the hard cheese finely and portion it into two bowls, one for the filling and one for the topping. Measure the ricotta and the tomato sauce, and have the mozzarella shredded and ready to scatter.
Ingredients at a glance (9)
- 2 medium green zucchini
- 3 cloves fresh garlic, minced
- 1/2 cup fresh basil leaves, divided
- 1 cup finely grated hard grating cheese, such as Parmesan, divided
- 1 cup whole-milk ricotta cheese
- kosher salt and black pepper to taste
- 1 tbsp olive oil
- 2 cups red tomato sauce
- 1 cup shredded mozzarella cheese
Instructions
Slice, season and fill the rolls
- Slice the zucchini into ribbonsTrim the ends of the green zucchini. Using a chef's knife on a wooden board, slice each zucchini lengthwise into thin, flat ribbons, about 1/8 inch thick. Discard the thin outer slices if they are mostly skin, and pat the ribbons dry with a towel.Look for Ribbons are thin enough to bend easily without cracking.Tip Slice on a steady angle so the ribbons stay long and even for rolling.
- Mince the garlic and basilMince the fresh garlic cloves finely. Set aside about 1/4 cup of the basil leaves for the filling and the rest for garnish. Tear the filling basil into small pieces so it spreads evenly through the ricotta.Look for Garlic is finely minced and the basil leaves are bright green and dry.Tip Dry the basil well so it does not water down the filling.
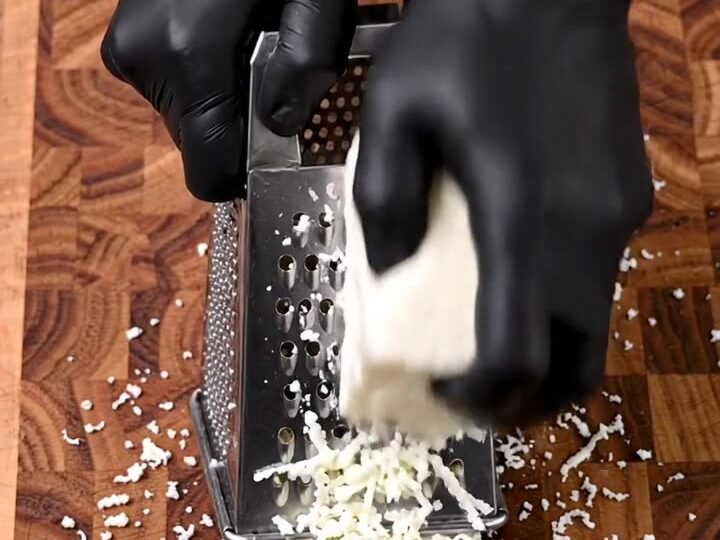
- Grate the hard cheese finelyGrate the hard grating cheese finely on the small holes of a box grater until you have a fluffy pile. Set aside about 1/2 cup for the filling and the rest for the topping.Look for The grated cheese is light and fluffy, almost like snow.Tip Let the cheese stand at room temperature for a few minutes so it spreads more easily.
At the end of this phase, the zucchini should be cut into long, thin, flexible ribbons, and the ricotta filling should be smooth, creamy and flecked with garlic and basil. Check the filling by tasting a small spoonful and adjusting the salt and pepper before you spread it.
Each ribbon should be thinly coated, leaving a small border so the filling does not squeeze out when you roll. The rolls should be snug and hold their shape when set seam-side down on the board. If a ribbon tears, patch it with a smaller piece and roll it anyway, since the sauce and cheese will hide the join once baked.
Nestle the rolls in simmering sauce
- Make the ricotta fillingIn a mixing bowl, combine the ricotta, the minced garlic, about 1/2 cup of the grated cheese and the torn basil. Season with kosher salt and black pepper, and stir until smooth and well blended.Look for The filling is creamy, spreadable and evenly flecked with green.Tip Taste a small spoonful and adjust the salt before filling the rolls.
- Roll the zucchini ribbonsLay the zucchini ribbons out on the board. Spread a thin layer of the ricotta filling over each ribbon, leaving a small border. Roll each ribbon up tightly, then arrange the rolls seam-side down on the board.Look for Rolls are snug and hold their shape without unrolling.Tip Start rolling from the narrow end so the filling stays inside.
- Simmer the sauce and nestle the rollsHeat the olive oil in a cast iron skillet over medium heat. Pour in the red tomato sauce and bring it to a gentle simmer. Nestle the rolls seam-side down into the simmering sauce.Look for The sauce bubbles gently around the edges of the rolls.Tip Spoon some sauce over the rolls so the tops do not dry out.
At the end of this phase, the red tomato sauce should be gently simmering in the cast iron skillet, with small bubbles breaking at the edges and the surface moving slightly. The rolls should sit snugly in the sauce, seam-side down, with the sauce partly covering their bases. Look for even spacing so the rolls cook at the same rate. If the sauce looks too thick to spread, add a splash of water so it coats the rolls without drying them out. Spoon some sauce over the tops, then move on to the topping.
Top, bake and serve warm
- Top and bake until bubblingScatter the shredded mozzarella and the remaining grated cheese over the rolls. Transfer the skillet, or move the rolls and sauce to a white ceramic baking dish, and bake at 375°F (190°C) for about 25 to 30 minutes, until the cheese is melted, bubbling and golden brown at the edges and the sauce has thickened.Look for Cheese is bubbling and golden at the edges while the sauce looks thick.Tip If the top browns too fast, cover loosely with foil for the last 5 minutes.
- Lift, garnish and serveLet the dish rest for about 5 minutes. Lift each roll with a spatula onto plates, spoon over some sauce, and garnish with the reserved basil leaves and a dusting of grated cheese. Serve warm.Look for Rolls hold their shape when lifted and the top is glossy and golden.Tip Resting briefly lets the filling firm slightly so the rolls slice cleanly.
At the end of this phase, the mozzarella and the reserved grated cheese should be melted, bubbling and golden brown at the edges, and the tomato sauce should look thick and glossy around the rolls. The top should hold together when you press it lightly with a spoon. Let the dish rest for about 5 minutes so the filling firms slightly. Check the center of a roll with a small knife: the filling should feel creamy and hot throughout. Once the sauce looks thick and the cheese is golden, lift the rolls with a spatula and serve them warm, while the top is still glossy.
Common mistakes
The most common problem is slicing the zucchini too thick. Thick pieces stay stiff, crack when rolled and never soften into a tender wrapper, so aim for ribbons about 1/8 inch thick and discard any that are mostly skin. Overfilling is the second problem.
Too much ricotta pushes out the ends and sets into a dense, uneven mass, so spread a thin, even layer that leaves a border. Rolling loosely also causes trouble, because loose rolls open in the sauce and lose their shape. Finally, skipping the rest after baking can make the rolls slide apart when lifted, so give the dish a few minutes before serving.
How to tell it’s done
The rolls are done when the mozzarella and the grated cheese are fully melted, bubbling across the top and golden brown at the edges, and the tomato sauce has visibly thickened around the rolls. The zucchini should be tender enough to cut with the edge of a fork, and the filling should feel hot and creamy in the center.
Because this recipe has no meat or eggs, there is no safe internal temperature to reach, but the filling should be steaming hot throughout before you serve. If the cheese is browning before the filling is hot, cover the dish loosely with foil and bake a few minutes longer.
Up next · Part 3 of 3
4 variations · storage & make-ahead · 5 answers · printable card
Tips, FAQ & printable recipe (Part 3)← Back to the ingredients (Part 1)