Dinner · Part 2 of 3: Instructions
Baked Meatballs with Fried Eggplant and Potatoes Step-by-step instructions
- Prep
- Cook
- Total
- Serves
- 4
Before you start
Before starting, cut the eggplant and potatoes into uniform 1-inch cubes so they cook evenly. Pat the eggplant dry with paper towels to reduce oil absorption. Heat the vegetable oil in a large skillet until shimmering.
Have the seared meatballs ready—if using homemade, ensure they are fully cooked or browned. Slice the peppers and measure the peas. Preheat the oven to 400°F (200°C) so it is ready when the dish is assembled. Prepare a large sheet of parchment paper by running it under water and crumpling it.
Ingredients at a glance (6)
- 1 large eggplant, cut into 1-inch cubes
- 2 medium potatoes, peeled and cut into 1-inch cubes
- 1 cup vegetable oil, for frying
- 400 g seared beef köfte meatballs
- 1 cup sweet green peas
- 3 sweet green sivri peppers, sliced
Instructions
Frying the Vegetables
- Fry the Eggplant and PotatoesHeat the vegetable oil in a large, deep skillet over medium-high heat until shimmering. Carefully add the eggplant cubes in batches and fry until golden brown and tender, about 4-5 minutes. Remove with a wire spider strainer and drain on paper towels. Repeat with the potato cubes, frying until golden and cooked through, about 5-6 minutes. Transfer the fried vegetables to a large round glass baking dish, spreading them evenly.Look for The eggplant and potatoes should be golden brown and crisp on the outside, tender inside.Tip Do not overcrowd the pan; fry in batches to keep the oil temperature steady.
- Layer the Meatballs and VegetablesArrange the seared beef meatballs over the fried eggplant and potatoes. Scatter the sweet green peas and sliced sivri peppers over the top, distributing them evenly among the meatballs. The dish will look colorful and hearty.Look for All ingredients should be evenly distributed in the baking dish.Tip Nestle the meatballs slightly into the vegetables so they stay moist while baking.
At the end of this phase, the eggplant and potatoes should be golden brown and crisp on the outside, with tender interiors. The kitchen will smell of hot oil and caramelizing vegetables. The fried vegetables are transferred to the baking dish, forming an even base. Check that the cubes are not greasy; if they are, drain them on paper towels. This step sets the stage for the layering.
Baking Under Parchment
- Cover and BakePreheat the oven to 400°F (200°C). Dampen a large piece of parchment paper under running water, crumple it gently, and shake off excess water. Place the damp parchment over the baking dish, tucking the edges under or around the rim to cover it snugly. Bake for 25 minutes, until the dish is bubbling and the flavors have melded.Look for The parchment will puff up slightly; the dish should be visibly bubbling at the edges.Safe temperature 160°F (71°C) internal temperature (ground meat)Tip The damp parchment creates a steamy environment, keeping everything moist and tender.
After 25 minutes in the oven, the dish should be bubbling around the edges, and the parchment will have puffed up like a dome. The aroma will be rich and savory, with notes of roasted peppers and meat.
Carefully peel back a corner to check that the meatballs are heated through and the vegetables are tender. The dish should look moist and saucy, not dry. If it seems dry, add a splash of water or broth and continue baking briefly.
The Final Reveal
- Uncover and ServeCarefully remove the baking dish from the oven. Peel back the parchment paper to reveal the steaming, bubbling meatballs and caramelized vegetables. Let the dish rest for a few minutes, then scoop hearty servings onto plates, making sure each portion gets meatballs, vegetables, and some of the juices.Look for The meatballs should be tender and the vegetables soft and caramelized.Safe temperature 160°F (71°C) internal temperature (ground meat)Tip Let the dish rest for 5 minutes before serving to allow the juices to settle.
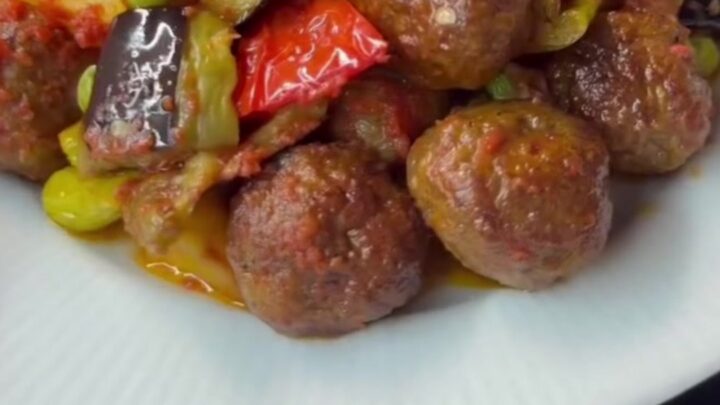
Once the parchment is pulled away, the dish should be steaming and bubbling, with caramelized edges and glossy juices. The meatballs should be tender and the vegetables soft, absorbing the surrounding flavors. The presentation is rustic and inviting, with the golden vegetables and green peas contrasting with the deep brown meatballs. Let it rest for a few minutes before serving to allow the flavors to meld.
Common mistakes
A common mistake is overcrowding the frying pan, which lowers the oil temperature and makes the vegetables greasy instead of golden. Fry in batches to maintain a consistent temperature. Another pitfall is using dry parchment paper; it must be dampened to create steam, otherwise the dish can dry out.
Also, do not skip frying the vegetables—this step is crucial for texture and flavor. Finally, ensure the meatballs are fully cooked before baking; if they are raw, increase the baking time and check the internal temperature.
How to tell it’s done
The dish is done when the meatballs are heated through and have reached an internal temperature of 160°F (71°C), and the vegetables are tender and caramelized at the edges.
The parchment will have puffed up, and the dish will be bubbling around the edges. Let it rest for a few minutes before serving to allow the juices to settle. The meatballs should be juicy and the vegetables soft enough to cut with a spoon.
- Ground meat: 160°F (71°C) in the thickest part
Up next · Part 3 of 3
4 variations · storage & make-ahead · 5 answers · printable card
Tips, FAQ & printable recipe (Part 3)← Back to the ingredients (Part 1)