Dinner · Part 2 of 3: Instructions
Baked Macaroni and Cheese with Crispy Cheddar Crust Step-by-step instructions
- Prep
- Cook
- Total
- Serves
- 8
Before you start
Before starting the cooking process, measure out all ingredients to ensure a smooth workflow. Shred the cheddar cheese from the block and set it aside for the top crust.
If using a refrigerated or homemade cheese sauce, warm it slightly so it combines easily with the pasta. Bring a large pot of water to a boil for the pasta, and preheat the oven to 375°F (190°C) so it is ready for baking.
Ingredients at a glance (3)
- 16 oz elbow macaroni
- 3 cups cheese sauce, store-bought or made ahead
- 2 cups cheddar cheese, shredded
Instructions
Pasta Preparation
- Boil the PastaBring a large pot of water to a rolling boil. Add the elbow macaroni and cook according to package instructions until just shy of al dente. Drain the pasta thoroughly in a colander and set aside.Look for The pasta should be slightly firm to the bite.Tip Do not overcook the pasta, as it continues to soften while baking.
At the end of this initial phase, the elbow macaroni should be cooked just shy of al dente, remaining slightly firm to the bite as it will finish cooking in the oven. The pasta should be thoroughly drained to prevent excess water from thinning out the cheese sauce, ensuring a rich and creamy consistency in the final baked dish.
Sauce Assembly and Pasta Folding
- Combine Pasta and SauceIn a large pot or bowl, combine the warm cooked elbow macaroni with the prepared cheese sauce. Stir gently with a spatula or wooden spoon until every noodle is completely coated and the mixture is creamy.Look for The pasta should be evenly coated with a thick, velvety layer of sauce.Tip Stir gently to avoid breaking the tender cooked pasta.
By the end of this phase, the cheese sauce and elbow macaroni should be completely combined, with no dry noodles remaining. Every single pasta piece should be thoroughly coated in a thick, velvety layer of sauce. The mixture should look rich and creamy, with a gentle steam rising from the pot as the pasta absorbs the flavors.
Bake and Crust Development
- Assemble the CasseroleTransfer the creamy macaroni mixture into a baking dish, spreading it into an even layer. Evenly sprinkle the shredded cheddar cheese over the top, making sure to cover the pasta completely to the edges.Look for The shredded cheese should form a uniform blanket over the pasta.Tip Spread the pasta all the way to the corners for even baking.
- Bake to Golden PerfectionPlace the baking dish in a preheated oven at 375°F (190°C) and bake for 20 to 25 minutes. The cheese on top should be completely melted, bubbling actively, and turned into a beautiful, crispy golden crust.Look for Look for bubbling edges and a deeply browned cheddar crust.Tip Let the dish rest for 10 minutes before slicing to help it set.
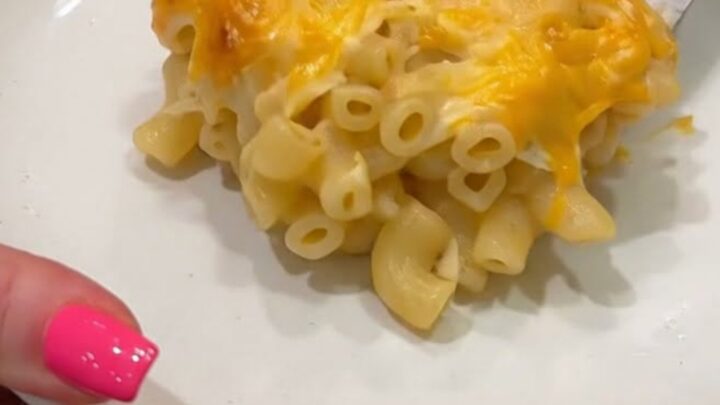
At the conclusion of the baking phase, the top layer of cheddar cheese should be fully melted, bubbling vigorously around the edges of the baking dish.
The crust should display a beautiful, deep golden-brown color with crispy, caramelized spots. When gently nudged, the casserole should be set but still retain a slight, luscious wiggle in the center, ready to be sliced and served.
Common mistakes
One common mistake is overcooking the pasta during the boiling stage. Because the macaroni undergoes a second cooking process in the oven, starting with fully soft pasta will result in a mushy, structureless dish.
Another error is using pre-shredded cheese for the topping, which contains anti-caking agents that prevent it from melting into a cohesive, crispy crust. Finally, avoid baking the dish for too long, which dries out the creamy cheese sauce.
How to tell it’s done
This baked macaroni and cheese is perfectly done when the sauce is bubbling actively at the edges of the baking dish and the cheddar topping has transformed into a crispy, golden-brown crust.
Since this recipe contains no raw proteins, there is no internal temperature requirement to meet. Instead, rely on visual cues: the top should be beautifully browned, the edges sizzling, and the center set enough to hold its shape when sliced after a brief rest.
Up next · Part 3 of 3
2 variations · storage & make-ahead · 3 answers · printable card
Tips, FAQ & printable recipe (Part 3)← Back to the ingredients (Part 1)