Appetizers · Part 2 of 3: Instructions
Baked Ham and Cheese Sticks with Crispy Seasoned Butter Crust Step-by-step instructions
- Prep
- Cook
- Total
- Serves
- 4
Before you start
Before starting the assembly process, organize the workspace to ensure a smooth workflow. Preheat the oven to 400 degrees Fahrenheit so it reaches the correct temperature by the time the sticks are ready to bake. Line a large baking sheet with parchment paper to prevent sticking.
Melt the butter in a small, microwave-safe bowl and stir in the seasoning blend. Lay out the eggroll wrappers, ham slices, and unwrapped string cheese sticks on a clean work surface, keeping a small bowl of water nearby to seal the wrappers.
Ingredients at a glance (5)
- 8 eggroll wrappers
- 8 slices deli ham
- 8 mozzarella string cheese sticks
- 2 tbsp unsalted butter, melted
- 1 tsp seasoning blend
Instructions
Assembly and Rolling
- Prepare the Seasoned ButterPreheat the oven to 400 degrees Fahrenheit. In a small bowl, combine the melted unsalted butter and seasoning blend. Stir the mixture thoroughly until the seasoning is evenly distributed throughout the butter, then set it aside for brushing later.Look for The seasoned butter should be uniform and fragrant.Tip Keep the butter warm so it remains fully liquid and easy to brush.
- Assemble the SticksLay one eggroll wrapper on a clean work surface with one corner pointing toward you. Place a slice of deli ham in the center, then place a mozzarella string cheese stick on top of the ham. Fold the bottom corner over the cheese, fold in the side corners tightly, and roll upward. Moisten the top corner with a dab of water to seal the edge securely.Look for The rolled stick must be tight and completely sealed with no gaps.Tip Keep unused wrappers covered with a damp paper towel to prevent them from drying out.
At the end of this phase, all eight ham and cheese sticks should be tightly rolled and completely sealed. The eggroll wrappers should look smooth, with the edges securely adhered using a touch of water. There should be no visible gaps or tears in the wrappers where cheese could escape. The rolled sticks should rest seam-side down on the prepared baking sheet, ready for the seasoned butter application.
Buttering and Baking
- Brush with Seasoned ButterPlace the assembled ham and cheese sticks seam-side down on a baking sheet lined with parchment paper. Use a pastry brush to coat the top, sides, and ends of each stick generously with the prepared seasoned butter, ensuring an even coating.Look for Each stick should be fully glistening with the butter mixture.Tip Make sure to brush the ends of the rolls to prevent them from burning.
- Bake Until GoldenTransfer the baking sheet to the preheated oven. Bake at 400 degrees Fahrenheit for twelve to fifteen minutes, turning the sticks over halfway through the baking time, until the wrappers are crispy, deeply golden brown, and sizzling.Look for The wrappers should look blistered, golden brown, and feel very firm.Tip Watch closely during the last few minutes to ensure the cheese does not burst out.
By the end of this baking phase, the sticks will have transformed into a beautiful, deep golden-brown color. The kitchen should be filled with the rich aroma of toasted seasoning, warm butter, and pastry.
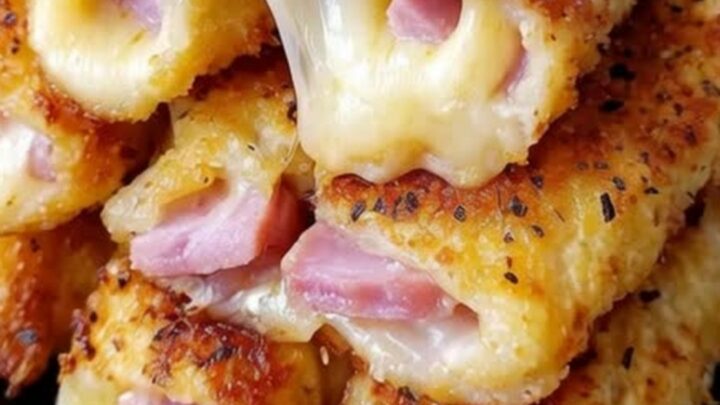
The wrappers should feel firm and exceptionally crispy to the touch, with a slight sizzle visible on the surface. A tiny amount of cheese may just begin to peek out from the edges, signaling perfect melted doneness.
Cooling and Serving
- Cool and ServeRemove the baking sheet from the oven. Let the cooked ham and cheese sticks rest on the baking sheet for two minutes to allow the hot cheese to set slightly before handling. Serve hot to experience the ultimate crispy texture and steaming cheese pull.Look for The sticks should be cool enough to handle but still hot and melty inside.Tip Serve immediately with your favorite dipping sauces like marinara or honey mustard.
At this final stage, the baked sticks have rested for a couple of minutes to let the molten cheese stabilize slightly. The exterior remains incredibly crunchy, while the cheese inside is hot, gooey, and ready to stretch. When pulled apart, the center should reveal a dramatic, steaming cheese pull. Serve them immediately on a platter while they are at their peak temperature and texture.
Common mistakes
One common mistake is rolling the eggroll wrappers too loosely. Loose rolling leaves air pockets inside the stick, which expand during baking and cause the cheese to burst through the wrapper, leaving an empty shell. Another error is neglecting to seal the edges properly.
Always moisten the edges of the wrapper with water and press firmly to create a tight seal. Finally, avoid overbaking the sticks; keeping them in the oven for too long will cause the cheese to liquefy completely and leak out, ruining the satisfying cheese pull.
How to tell it’s done
Determining the perfect doneness for these sticks relies on visual and tactile cues. The exterior of the eggroll wrappers must be a uniform golden brown and feel completely hard and crispy when tapped with a utensil.
Because the ham is already fully cooked and the cheese only needs to melt, there is no raw protein to monitor. The sticks are done when the wrappers are deeply browned and crispy, typically after twelve to fifteen minutes of baking at 400 degrees Fahrenheit. Serve immediately to enjoy the cheese at its optimal melted state.
Up next · Part 3 of 3
2 variations · storage & make-ahead · 3 answers · printable card
Tips, FAQ & printable recipe (Part 3)← Back to the ingredients (Part 1)