Desserts · Part 2 of 3: Instructions
Decadent Baileys Chocolate Cheesecake Trifle Step-by-step instructions
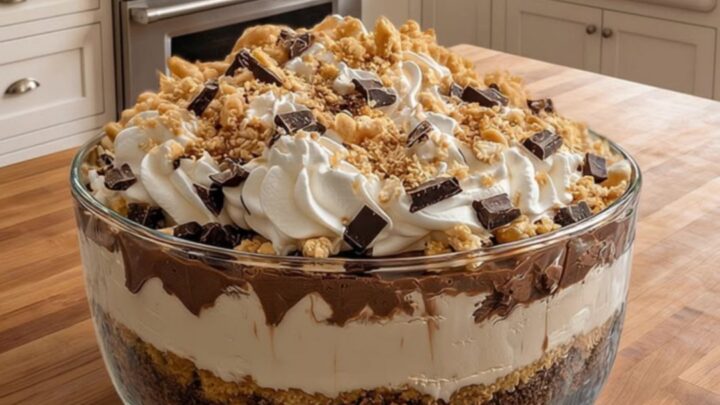
- Prep
- Cook
- Total
- Serves
- 8
Before you start
Before beginning the assembly, ensure all ingredients are measured and ready on your workspace. The cream cheese must be at room temperature to whip effectively, while the chocolate ganache should be prepared and kept warm until assembly.
Have your piping bag fitted with a star nozzle if you plan to pipe the whipped cream rosettes. Clear adequate space in your refrigerator to accommodate the trifle bowl, as chilling is a mandatory step that ensures the stability of the layers before the dessert is finally served to guests.
Ingredients at a glance (6)
- 16 oz cream cheese, softened
- 1/4 cup Baileys Irish Cream
- 2 cups chocolate crumble
- 1 cup chocolate ganache, warm
- 2 cups whipped cream
- 1/4 cup chopped chocolate
Instructions
Cheesecake preparation
- Prepare the cheesecake fillingPlace the softened cream cheese in a large mixing bowl and beat until completely smooth. Slowly drizzle in the Baileys Irish Cream, continuing to mix thoroughly until the mixture is uniform, light, and airy. Ensure no lumps remain in the bowl before proceeding.Look for The mixture is smooth, spreadable, and completely lump-free.Tip Bring the cream cheese to room temperature beforehand to prevent lumping during mixing.
The cheesecake base is ready when it is completely smooth, lump-free, and has a light, airy consistency. When you lift the beaters, the mixture should hold a soft peak. Ensure the Baileys is fully incorporated, leaving a uniform, glossy appearance that indicates it is ready for the assembly phase.
Assembly of layers
- Assemble the dessert layersScatter a layer of chocolate crumble across the bottom of the glass trifle bowl. Spread a thick, even layer of the prepared cheesecake filling over the crumble. Drizzle the warm chocolate ganache gently over the top. Repeat the layers, finishing with cheesecake filling on top.Look for Distinct, neat layers of dark crumble, smooth cheesecake, and chocolate ganache are visible through the glass.Tip Use a small offset spatula to spread the layers out toward the edges of the bowl.
At the end of the assembly, the trifle should show clear, distinct lines of chocolate crumble, cheesecake, and ganache through the sides of the glass. The layers should appear level and consistent. The top should be flat and ready to receive the final whipped cream decoration, looking clean and professional.
Final chilling and garnish
- Garnish and chillTransfer the whipped cream into a piping bag fitted with a star tip and pipe neat rosettes across the surface of the trifle. Scatter the chopped chocolate evenly over the rosettes. Transfer the trifle bowl to the refrigerator to chill for at least two hours before scooping.Look for The whipped cream rosettes hold their shape and the chocolate ganache sets firmly.Tip Refrigeration allows the moisture to set the layers together for clean scooping.
The trifle is finished when the whipped cream rosettes are piped neatly on top and the chocolate pieces are evenly distributed.
After the required chilling time, the entire dessert should feel stable and set. Check that the ganache has firmed up slightly and the cream has retained its shape, indicating it is ready to serve.
Common mistakes
A common mistake is using cream cheese that is too cold, which results in a lumpy cheesecake layer rather than a smooth, velvety one. Another error is failing to chill the trifle long enough; if served too soon, the layers will be too soft, causing them to blend together in the bowl instead of remaining distinct.
Finally, avoid using ganache that is too hot, as it will melt the whipped cream or cheesecake, ruining the structural integrity of the layers you worked so hard to create.
How to tell it’s done
The cheesecake layer is done when it is smooth and holds its shape without being overly stiff. The chocolate ganache should be glossy and slightly thickened when it hits the cool cheesecake.
The final trifle is fully set when it has chilled in the refrigerator for at least two hours, allowing the structure to stabilize so that individual scoops keep their distinct layers without running together in the serving dish.
Up next · Part 3 of 3
2 variations · storage & make-ahead · 3 answers · printable card
Tips, FAQ & printable recipe (Part 3)← Back to the ingredients (Part 1)