Dinner · Part 2 of 3: Instructions
Bacon-Wrapped Stuffed Meatloaf with Molten Cheese Step-by-step instructions
- Prep
- Cook
- Total
- Serves
- 6
Before you start
Before you begin, ensure your ingredients are ready for assembly. Remove the meat mixture from the refrigerator about 20 minutes before you start, but keep it cool.
Ensure you have enough parchment paper to line your baking sheet, and preheat your oven to 375°F (190°C) so it is ready once the loaf is assembled. Have your meat thermometer handy to monitor the internal temperature accurately.
Ingredients at a glance (3)
- 2 lb meatloaf mixture
- 8 oz mozzarella cheese, sliced or shredded
- 10 slices bacon
Instructions
Preparation of the meat base
- Prepare the meatloaf basePlace the meatloaf mixture into a large mixing bowl. Season the meat according to your preference and mix thoroughly until well combined, taking care not to overwork the meat to ensure a tender result after baking.Look for The mixture should be uniform and hold its shape when pressed together.Tip Keep the meat chilled until right before you start mixing to ensure the fat stays firm.
The meat should be seasoned and mixed until just combined. The texture should be tacky and pliable, making it easy to shape into the loaf without falling apart. Ensure the bowl is clean and the workspace is organized before moving on to the stuffing phase.
Stuffing and wrapping
- Stuff and wrap the meatloafShape half of the meatloaf mixture into a loaf on a parchment-lined baking sheet. Create a shallow indentation down the center and fill it with the mozzarella cheese. Cover with the remaining meat, sealing the edges firmly so the cheese stays inside. Wrap the entire loaf with the bacon slices, overlapping them slightly to cover the surface completely.Look for The bacon should cover the entire loaf snugly without gaps.Tip Tuck the ends of the bacon underneath the loaf so they do not curl up while cooking.
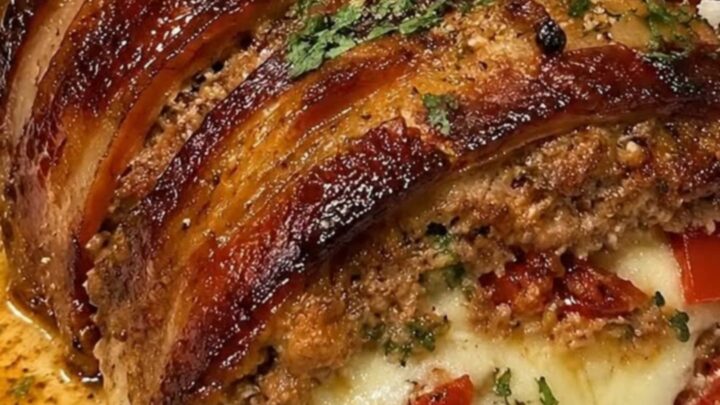
The meatloaf should be neatly shaped with the cheese securely enclosed in the center.
The bacon slices should be wrapped tightly around the loaf, overlapping slightly to ensure full coverage. There should be no visible cheese or meat gaps on the exterior of the loaf.
Baking to perfection
- Bake and serveBake the meatloaf in a preheated oven at 375°F (190°C) for approximately 60 minutes. Use a meat thermometer to ensure the center reaches an internal temperature of 160°F (71°C) for the ground meat. Remove from the oven and let it rest for at least 10 minutes before slicing to allow the juices to redistribute and the cheese to set slightly.Look for The bacon should be crispy and golden brown, and the meat cooked through.Safe temperature 160°F (71°C) internal temperature (ground meat)Tip Letting the meatloaf rest is essential to prevent the cheese from flowing out entirely when you cut the first slice.
The meatloaf is ready when the bacon is crispy and the internal temperature of the meat has reached the safe threshold. The aroma of roasted meat and rendered bacon should fill the kitchen. Check for a firm structure before removing it from the oven to rest.
Common mistakes
A common mistake is over-mixing the meat mixture, which results in a dense and rubbery texture. Mix only until the ingredients are just combined. Another error is failing to seal the edges of the meatloaf properly, which leads to the mozzarella leaking out.
Finally, skipping the resting time will result in the cheese flowing out immediately when you slice the loaf, losing that signature molten center.
How to tell it’s done
The meatloaf is fully cooked when the internal temperature reaches 160°F (71°C) when measured at the thickest part of the meat. The bacon should be golden brown and crisp to the touch.
Because of the cheese filling, it is important to let the meatloaf rest for at least 10 minutes after removing it from the oven to allow the internal temperature to stabilize and the cheese to set slightly.
- Ground meat: 160°F (71°C) in the thickest part
Up next · Part 3 of 3
2 variations · storage & make-ahead · 3 answers · printable card
Tips, FAQ & printable recipe (Part 3)← Back to the ingredients (Part 1)