Dinner · Part 3 of 3: Tips & recipe card
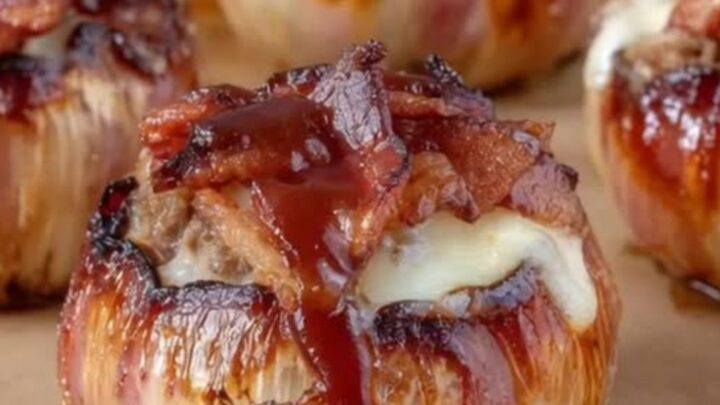
Bacon Cheddar Onion Bombs with Sweet Barbecue Glaze Tips, FAQ & printable recipe
- Prep
- Cook
- Total
- Serves
- 4
Tips for success
To make wrapping the bacon easier and more secure, use wooden toothpicks to pin the loose ends of the bacon slices into the onion shell before baking. Just remember to remove the toothpicks before serving to your guests.
If you struggle to get the bacon as crispy as you like, you can turn on the oven's broiler for the last two to three minutes of cooking after applying the barbecue sauce glaze, watching closely to prevent the sugars in the sauce from burning.
When hollowing out the onions, save the inner layers that you do not use for the shells. You can chop them up and freeze them for future soups, stews, or stir-fries, ensuring nothing goes to waste.
For an extra layer of flavor, you can mix a tablespoon of the barbecue sauce directly into the raw ground beef mixture along with the seasonings, which adds a subtle sweetness and moisture to the meat filling.
Variations
- Spicy Jalapeno Bombs: Mix finely diced jalapenos into the ground beef mixture and use pepper jack cheese for a spicy kick.
- Mini Onion Bombs: Use smaller onions and adjust the baking time down to 25 minutes for perfect bite-sized party appetizers.
Storage and make-ahead
- Fridge
- Store leftovers in an airtight container in a single layer in the refrigerator for up to 3 to 4 days.
- Freezer
- Freeze baked bombs in a freezer-safe container for up to 2 months. Thaw overnight in the fridge before reheating.
- Reheat
- Reheat in a 350°F (177°C) oven for 15-20 minutes until the center is hot and the bacon crisps up again.
Store any leftover onion bombs in an airtight container in the refrigerator within two hours of cooking. They will keep well for up to three to four days. To maintain the texture of the bacon and prevent the onion from becoming too mushy, avoid stacking the bombs on top of each other in the storage container; place them in a single layer instead.
These onion bombs can be fully assembled, wrapped in bacon, and stored on a tray covered tightly with plastic wrap in the refrigerator up to 24 hours before you plan to bake them.
When ready to cook, let them sit at room temperature for about 20 minutes to take the chill off, then bake as directed, adding a few extra minutes to the baking time if they are still cold.
Serving ideas
Serve these spectacular onion bombs hot, straight from the oven, alongside classic barbecue sides like creamy coleslaw, potato salad, or roasted corn on the cob.
The rich, smoky, and sweet flavors of the bombs pair beautifully with the crisp freshness of a green salad dressed with a tangy vinaigrette, which helps cut through the richness of the bacon and cheese.
For a casual dinner, you can serve them on toasted brioche buns with extra barbecue sauce, lettuce, and tomato slices, treating them like an elevated, gourmet style burger. They also make a fantastic centerpiece for a backyard cookout or game-day platter, arranged on a rustic wooden board with small bowls of extra barbecue sauce for dipping.
Frequently asked questions
Can these onion bombs be made ahead of time?
How is the bacon prevented from unraveling during baking?
What is the safe internal temperature for the ground beef filling?
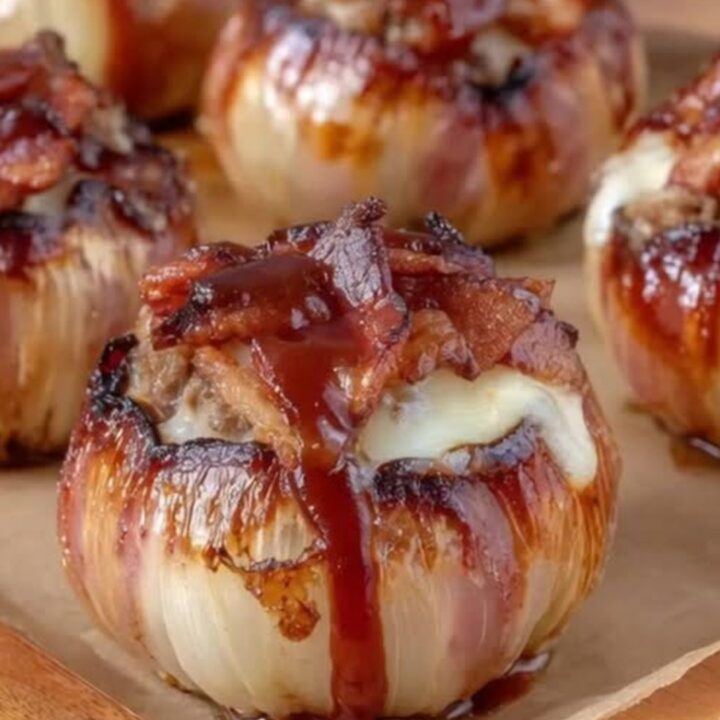
Bacon Cheddar Onion Bombs with Sweet Barbecue Glaze
Ingredients
- 2 large yellow onions, peeled and cut in half crosswise to create 4 hollow shells
- 1 lb ground beef
- 1 tbsp beef seasoning
- 4 oz cheddar cheese, cut into 1-inch cubes
- 8 slices bacon
- 1/2 cup barbecue sauce
Instructions
- Peel the yellow onions and slice them in half crosswise. Carefully hollow out the center of each half, leaving the outer two to three layers intact to create four sturdy onion cups. Save the discarded inner onion layers for future cooking use. Set the prepared onion shells aside on your clean work surface.
- In a medium mixing bowl, combine the ground beef and beef seasoning. Use your hands to gently mix the seasoning into the meat until evenly distributed throughout, being careful not to overwork the beef so it remains tender.
- Divide the seasoned ground beef into four equal portions. Press a portion of beef into each hollowed onion shell, inserting a solid cube of cheddar cheese into the very center of the beef so it is completely enclosed and sealed within the meat.
- Wrap two slices of bacon tightly around each stuffed onion bomb, covering the exposed beef and wrapping snugly around the onion shell. Secure the loose ends of the bacon with wooden toothpicks if necessary to keep them in place.
- Place the wrapped onion bombs on a parchment-lined baking sheet. Bake in the preheated oven at 400°F (204°C) for 35 to 40 minutes, until the ground beef is cooked through to a safe internal temperature of 160°F (71°C) and the bacon is crispy.
- Brush the glossy barbecue sauce generously over the crispy bacon exterior of each onion bomb. Return to the oven for an additional 5 minutes until the glaze is bubbling, sticky, and beautifully caramelized. Remove from the oven and let rest for 5 minutes before serving.
Estimated nutrition per serving
- Calories
- 510
- Protein
- 32 g
- Carbohydrates
- 16 g
- Fat
- 35 g
- Fiber
- 2 g
- Sugar
- 11 g
- Sodium
- 980 mg
Next recipe

Creamy Seafood Lasagna with Shrimp and Crab
See the recipe → →This recipe is based on a short cooking video and is published under the pen name Clara Weller. It was checked before publication, but errors can slip through. Nutrition, when shown, is an estimate. Read more in our editorial policy and on our food safety page.
More recipes to try

Cheddar Bay Hamburger Casserole in One Skillet
Total time: 30 min
Cheesy Rotel Beef Tacos with Crispy Shells
Total time: 25 min
Authentic Greek Pastitsio with Spiced Beef and Velvety Bechamel
Total time: 2 h
Crispy Bacon Wrapped Garlic Parmesan Chicken in One Pan
Total time: 45 min
Creamy Smothered Chicken with Bacon and Garlic Sauce
Total time: 45 min