Appetizers · Part 2 of 3: Instructions
Crispy Air-Fryer Cheesy Taco Pinwheels in 7 Minutes Step-by-step instructions
- Prep
- Cook
- Total
- Serves
- 4
Before you start
Cook the ground beef ahead if it is not already done — brown half a pound with taco seasoning, drain it well and let it cool completely; you need half a cup, crumbled small.
Pull the cream cheese out of the refrigerator ten minutes early so it spreads without tearing the tortillas, and drain and blot the green chiles. Shred the cheddar, lay out a clean cutting board, and set a sharp knife, an offset spatula, a pastry brush and a few toothpicks within reach.
Ingredients at a glance (8)
- 4 oz taco-spiced cream cheese, softened
- 1/2 cup cooked ground beef, crumbled small
- 1/4 cup diced green chiles, drained well
- 1 cup shredded cheddar
- 2 large flour tortillas (burrito-size, about 10 inches)
- 1 tbsp avocado oil, for brushing
- Chopped cilantro, for serving
- Chunky roasted salsa, for serving
Instructions
Build the spirals
- Spread the taco cream cheeseLay the two flour tortillas flat on a clean cutting board. Divide the softened taco-spiced cream cheese between them and spread it edge to edge with an offset spatula, going all the way to the rim. A thin, even coat seals the tortilla and keeps every layer of filling anchored as the roll tightens.Look for The cream cheese should cover the surface in a thin, uniform film with no bare spots showing through.Tip Let the cream cheese sit at room temperature for ten minutes first; cold cream cheese tears the tortilla and drags the filling.
- Layer the beef and chilesScatter the crumbled cooked ground beef evenly over the cream cheese on both tortillas, then spoon the drained diced green chiles across the top. Press the filling down gently with the back of a spoon so it embeds into the cheese layer. Keep everything inside a half inch of the far edge so the roll can seal cleanly.Look for The beef and chiles should sit in a single, even layer with no clumps piled in the center.Tip Blot the chiles with a paper towel; extra moisture steams the pinwheels instead of crisping them.
- Add the cheddar and roll tightShower the shredded cheddar over the filling on each tortilla, spreading it to the edges. Starting at the side nearest you, roll each tortilla up tightly, tucking as you go, until you reach the far edge. A tight roll is what keeps the pinwheels round and the cheese inside rather than oozing onto the air-fryer basket.Look for The finished log should feel firm and hold its shape with no loose, floppy center.Tip Roll away from you with even pressure, like a sleeping bag, and the log will stay round instead of tapering.
At the end of this phase you have two tight, even logs wrapped and firming in the refrigerator. Pick one up: it should feel solid along its whole length, with no soft, hollow center where the roll loosened.
The cream cheese layer should look continuous from end to end — bare spots mean the filling will leak during slicing. If a log feels slack, re-roll it tighter before it chills. Ten to fifteen minutes of chilling is enough; the goal is a log that slices cleanly, not one that needs an hour.
Slice, brush and preheat
- Chill and slice the pinwheelsWrap each log snugly in plastic wrap and refrigerate for ten to fifteen minutes so the cream cheese firms up and the roll holds its shape. Unwrap, then slice each log with a sharp knife into 1-inch pinwheels, wiping the blade between cuts. You should get about eight rounds per tortilla, sixteen in all.Look for Each slice should cut cleanly, showing a tight spiral of filling with no smearing.Tip A short chill makes cleaner slices; skip it and the knife drags the filling out of the spiral.
- Brush with avocado oilArrange the pinwheels cut side up on the cutting board and brush the tops and exposed edges lightly with the avocado oil. The oil encourages deep golden blistering on the tortilla and helps the cheese bubble under the heat. Use a light hand; a slick of oil pools in the basket and softens the bottoms.Look for The surface should glisten evenly, not shine with pooled oil.Tip Brush just before cooking so the tortillas do not absorb the oil and turn dense.
- Preheat the air fryerSet the air fryer to 390°F and let it preheat for three minutes while you finish brushing. A hot basket sears the bottom of the pinwheels on contact, so they crisp from the first minute instead of slowly drying out. Work in two batches if needed; crowding blocks the air and gives pale, chewy edges.Look for The basket should feel hot to a hover of the hand above it after about three minutes.Tip No preheat button needed; just run the empty fryer at temperature for three minutes.
Sixteen rounds should sit on the board, each showing a clean spiral of beef, chiles and cheddar with no smearing. The cut faces should look packed, not gappy. After brushing, the surfaces glisten evenly — check the basket for pooled oil and blot any excess. The air fryer reads 390°F and the basket is hot to a hover of the hand. If your fryer is smaller than 4 quarts, confirm you have room for a single layer now, before anything goes in.
Air-fry and serve
- Air-fry until golden and bubblyPlace the pinwheels in the basket in a single layer, flat side down, with a little space between each one. Air-fry at 390°F for 7 minutes, checking at the five-minute mark. The tortilla edges should blister deep golden and the cheddar should bubble at the seams. Flip them halfway if your fryer runs hot on top.Look for Deep golden, blistered edges and visibly bubbling cheese at the spiral seams.Tip If the tops color before the seven minutes are up, lower to 370°F for the last minute or two.
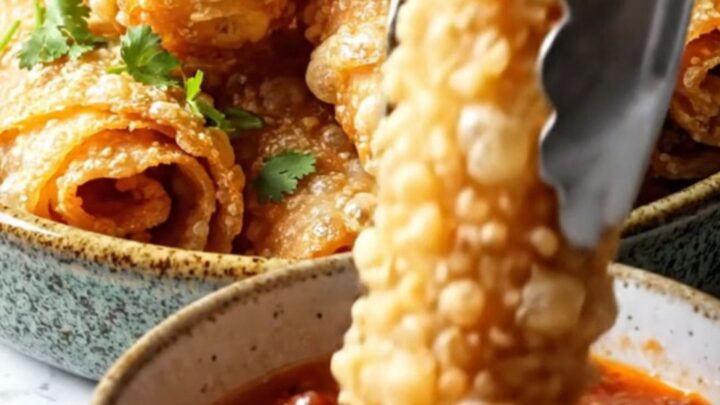
- Rest briefly, then garnishTransfer the pinwheels to a warm platter and let them sit for a minute; the cheese settles back into the spiral instead of running off the first bite. Scatter chopped cilantro over the hot pile. Serve straight away while the edges still crackle and the centers stay molten.Look for The cheese should look glossy and set at the edges but still molten within.Tip A one-minute rest on a rack, not a plate, keeps the bottoms crisp instead of steaming them.
- Serve with roasted salsaSpoon the chunky roasted salsa into a small dipping bowl and set it beside the platter. Dunk a pinwheel straight in while it is hot; the crispy spiral holds up to a thick, chunky salsa without falling apart. Refill the bowl as the platter empties, which will not take long.Look for Serve while the edges audibly crackle; the pinwheels are at their peak in the first ten minutes.Tip Warm the salsa briefly in the microwave so it does not cool the cheese on contact.
The pinwheels come out with deep golden, blistered edges and cheddar bubbling at every seam, smelling of toasted tortilla and taco spice. Tap an edge: it should feel crisp, not bend softly. After a one-minute rest the cheese is glossy and set at the borders but still molten within, and the cilantro has wilted slightly against the heat. Serve immediately with the roasted salsa alongside — the crackle is at its peak in the first ten minutes out of the fryer.
Common mistakes
The most common failure is a loose roll: pinwheels that unspool in the basket and spill cheddar everywhere. Roll firmly, chill the wrapped log, and use a toothpick through thick slices if needed. The second is wet filling — unblotted chiles or warm beef soften the cream cheese, the tortilla steams, and the edges never crisp.
The third is crowding; stacked pinwheels steam each other and come out pale and chewy instead of blistered. Finally, too much oil pools in the basket and makes greasy bottoms — brush lightly and let the hot circulating air do the browning.
How to tell it’s done
The pinwheels are done when the tortilla edges have blistered deep golden brown and the cheddar is visibly bubbling at the spiral seams — at seven minutes at 390°F this happens right as the cheese turns fully molten and the cream cheese layer softens into a creamy bind.
Cut one open at the five-minute check if the color looks ahead of schedule: the center should be hot and creamy with melted cheddar, never cool or stiff. The beef in the filling is already fully cooked, so the only visual proof you need is color and bubbling.
Up next · Part 3 of 3
4 variations · storage & make-ahead · 5 answers · printable card
Tips, FAQ & printable recipe (Part 3)← Back to the ingredients (Part 1)