Desserts · Part 2 of 3: Instructions
4-Ingredient Snickers Stuffed Dates Step-by-step instructions
- Prep
- Cook
- Total
- Serves
- 12
Before you start
Before starting, gather all your ingredients and equipment. Pit the Medjool dates if they are not already pitted, and set them aside. Measure the peanut butter and roasted peanuts so they are ready to use. Chop the dark chocolate into small, even pieces to ensure even melting.
Line a baking sheet with parchment paper to hold the dipped dates. If you plan to pipe the peanut butter, prepare a piping bag or a zip-top bag with a corner snipped off. Have the flaky sea salt within reach for sprinkling right after dipping.
Ingredients at a glance (5)
- 12 Medjool dates, pitted
- 1/2 cup creamy peanut butter
- 1/4 cup roasted salted peanuts
- 8 oz dark chocolate, chopped
- 1/2 tsp flaky sea salt
Instructions
Fill the Dates
- Prepare the DatesUsing a small knife, slice each Medjool date lengthwise down one side. Remove the pit if not already pitted, and gently open the date like a book. Set the dates aside on a cutting board.Look for The dates should be split but still attached on the other side, creating a pocket for the filling.Tip If the dates are very sticky, lightly dampen your fingers to prevent them from tearing.
- Fill with Peanut ButterSpoon a generous amount of creamy peanut butter into each date cavity. Use a small spoon or a piping bag to fill the dates evenly, leaving a slight mound on top so the filling is visible.Look for The peanut butter should be smooth and slightly domed above the date's surface.Tip For easier piping, warm the peanut butter for a few seconds in the microwave, but do not overheat.
- Press on PeanutsPress roasted salted peanuts into the peanut butter filling, covering the surface with a single layer of peanuts. Gently push the peanuts so they adhere well.Look for The peanuts should be firmly embedded in the peanut butter, creating a crunchy topping.Tip Chop the peanuts coarsely if you prefer smaller pieces, but whole halves give a better crunch.
After this phase, you should have 12 neatly split dates with a generous mound of peanut butter and a layer of peanuts pressed into the filling. The dates should be intact, and the filling should be visible but not overflowing. The peanuts should be firmly embedded so they do not fall off during dipping. Take a moment to ensure the dates are all similar in size and filling amount for even chocolate coverage.
Dip and Season
- Melt the ChocolatePlace the chopped dark chocolate in a microwave-safe bowl. Microwave in 30-second intervals, stirring after each, until the chocolate is fully melted and smooth. Alternatively, melt it over a double boiler.Look for The chocolate should be glossy and completely smooth with no lumps.Tip Do not overheat the chocolate, as it can seize. Stop heating when a few small pieces remain and stir until smooth.
- Dip the DatesUsing a fork, dip each filled date into the melted chocolate, turning to coat completely. Lift the date out and allow the excess chocolate to drip off before placing it on the parchment-lined baking sheet.Look for The chocolate coating should be even and cover the date and filling entirely, with a thin layer.Tip Tap the fork gently on the bowl's edge to remove excess chocolate and create a neat finish.
- Sprinkle with Sea SaltWhile the chocolate is still wet, sprinkle a pinch of flaky sea salt over each chocolate-covered date. Work quickly so the salt sticks to the chocolate.Look for The salt flakes should be visible on the surface, adding a subtle salty contrast.Tip If the chocolate starts to set before salting, the salt may not adhere; you can also sprinkle after chilling.
At the end of this phase, the dates should be completely coated in chocolate, with no bare spots. The chocolate should be smooth and glossy, and the excess should have dripped off so the coating is even. The flaky sea salt should be sprinkled on top while the chocolate is still wet, so it adheres. The dates should be spaced apart on the parchment-lined baking sheet so they do not touch each other.
Chill and Serve
- Chill Until SetPlace the baking sheet in the freezer and chill for 10 minutes, until the chocolate shell is firm and snaps cleanly when broken. The dates should be fully set before serving.Look for The chocolate should be hard to the touch and break with a crisp snap.Tip If you prefer a softer chocolate, chill for only 5 minutes, but a full 10 minutes gives the classic snap.
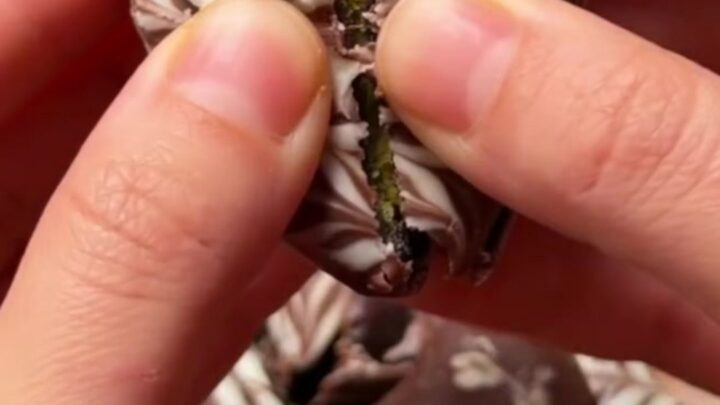
After chilling, the chocolate should be hard and have a shiny finish. When you break one open, the shell should crack cleanly, revealing the chewy date, creamy peanut butter, and crunchy peanuts.
The sea salt should be visible on the surface. The dates can be served immediately or kept in the freezer until ready to eat. The texture should be firm but not rock-hard, and the flavors should be balanced between sweet, salty, and nutty.
Common mistakes
One common mistake is overheating the chocolate, which causes it to seize and become thick and lumpy. Always melt in short bursts and stir frequently. Another issue is using dates that are too dry, which makes them hard to fill and less enjoyable to eat. If your dates are dry, soak them briefly in warm water.
Filling the dates too full can cause the chocolate to crack or the filling to ooze out during dipping. Also, if you skip the sea salt, you lose the sweet-salty balance that makes these dates so addictive. Finally, do not rush the chilling time—if the chocolate is not fully set, it will be messy to handle.
How to tell it’s done
The stuffed dates are done when the chocolate coating is firm and snaps cleanly when you break one in half. After 10 minutes in the freezer, the chocolate should be hard to the touch and not leave a fingerprint when pressed gently. The interior should be soft and chewy, with the peanut butter slightly firm but not frozen solid.
If you prefer a softer chocolate, you can chill for less time, but the classic candy-bar experience comes from a crisp shell. The dates can be served directly from the freezer or after a few minutes at room temperature, depending on your preference.
Up next · Part 3 of 3
4 variations · storage & make-ahead · 5 answers · printable card
Tips, FAQ & printable recipe (Part 3)← Back to the ingredients (Part 1)